Whether you're a seasoned Klaviyo user with a bustling team behind you or a solo entrepreneur poised for expansion, adding users to your Klaviyo account and managing their access is crucial for maximizing efficiency.
Klaviyo is your ultimate platform for streamlining marketing efforts, from crafting compelling email campaigns to engaging customers via SMS. But as your business grows and you start outsourcing marketing tasks, it's important to add users to your Klaviyo account to help out. And if you're handling marketing for other businesses, you'll likely need to request access to their accounts too.
In this post, we'll walk you through everything you need to know about adding, updating, and removing users from your Klaviyo account. So whether you're a seasoned pro or just dipping your toes into the world of email marketing, let's dive into the world of Klaviyo user management.
Table of Contents
Why Give Someone Access to Klaviyo?
Planning and running email campaigns can be a ton of work. Crafting compelling content, segmenting audiences, and analyzing results - it's a whole production. When you've got a million other things on your plate, sharing the load or farming out tasks just makes sense, right?
Now, being the savvy pro you are, you decide to let your team in on the Klaviyo action. Let's talk about why sharing Klaviyo access can be a gamechanger for your email marketing:
Teamwork Makes the Dream Work
Picture this: your team, all synced up in one account, brainstorming killer campaign ideas, analyzing data like pros, and ticking tasks off the to-do list at lightning speed. That's the power of teamwork.
Boost Efficiency
Ever heard the phrase "many hands make light work"? Well, it rings true here too. With everyone pitching in, tasks get done faster, giving you more time to focus on growing your business (or savoring that well deserved coffee!).
Skill Swap
Every team has it's stars, right? Whether you've got a data whiz who can slice and dice like a pro or a design ace who can make your emails shine, sharing access means tapping into those talents and kicking your campaigns up a notch.
Learning Zone
Sharing access isn't just about checking off tasks — it's a chance for your team to level up. Hands-on time with Klaviyo means honing email marketing skills, picking up new tricks, and becoming certified email gurus in no time.
No Secrets Here
When everyone knows their role and can see who's handling what, accountability comes naturally. It's like having your own built-in accountability squad, keeping things running smoothly — even when someone's on vacation.
Klaviyo User Roles and Permissions
Klaviyo makes role management a breeze by organizing access levels based on the types of users who might need access. There are seven different user roles in Klaviyo, but only six of them are available to assign to a new user. Each role comes with its own unique access privileges:
- Owner
- Admin
- Manager
- Analyst
- Campaign Coordinator
- Content Creator
- Support
Let's dive into each of these roles and talk about when it's a good idea to assign them to a new user. If you want a deeper look into what each role can do with Klaviyo features, be sure to check out Klaviyo's user management and privileges reference article.
Owner
The Owner role is the top-tier status, giving a user complete access to all account features. Owners can view and edit everything in the account, even closing it down entirely if needed. They'll also receive all critical account notifications from Klaviyo.
Remember, each account can only have one Owner, and typically, it's automatically assigned to the first person who creates the Klaviyo account.
To assign the Owner role to someone else, you'll need to go through the process of transferring account ownership.
Admin
The Admin role has full access to the Klaviyo account. They can do everything an Owner can do, except close down the account (unless they submit proof the Owner is no longer with the company).
Typically, the Admin role is given to trusted people within your team. They're the ones who need full Klaviyo access to help manage permissions for others or to grab customer lists and data for all sorts of business needs.
Manager
The Manager role opens up access to all the core Klaviyo features, but there are a few limitations to keep in mind. Managers can't export email lists, invite new team members, or tweak account settings.
The Manager role is usually for trusted people who need full access to Klaviyo but require approval before exporting email lists or changing account settings. If you work with an agency or freelancer who needs broad access to Klaviyo, this is the recommended access level.
Analyst
The Analyst role has access to analytics, segments, and reporting. They can see all the data, but they can't edit any Campaigns, Flows, Sign Up Forms, or Templates within Klaviyo.
The Analyst role is usually for people who love diving into numbers and charts. They're the ones keeping tabs on account analytics, whipping up reports, and staying on top of important metrics like open rates and click rates. They're responsible for making sense of the data and finding ways to optimize your campaign performance.
Campaign Coordinator
The Campaign Coordinator role is the mastermind behind your email campaigns. They can create and send campaigns and create and edit templates.
The Campaign Coordinator role is ideal for people who handle the nitty-gritty of your marketing or product calendar. They're the ones managing the day-to-day logistics, from scheduling and coordinating email blasts to handling signup forms and organizing all the campaign details.
Content Creator
The Content Creator role is perfect for the artistic souls on your team. They're the ones who craft and tweak your eye-catching templates. The Content Creator role can load templates into Flows or Campaigns that are already set up, but they can't mess with any Flow settings or send out or schedule Campaigns.
The Content Creator role is for the creative types responsible for bringing your emails to life. Whether they're writers, graphic designers, user experience gurus, brand wizards, or other creative talents, they're the ones making your emails shine.
Support
The Support role is all about being there for customers when they need a helping hand. Users in this role have access to SMS conversations and can access certain details in user profiles, like profile info, activity feeds, and contact details.
In a nutshell, the Support role is ideal for support reps who are ready to help solve any customer queries that come their way. They're the heroes behind the scenes making sure customers have the best experience possible.
How to Add a User to Klaviyo
Now that you've got the perfect role in mind for your new user, let's go over how to add them to your Klaviyo account.
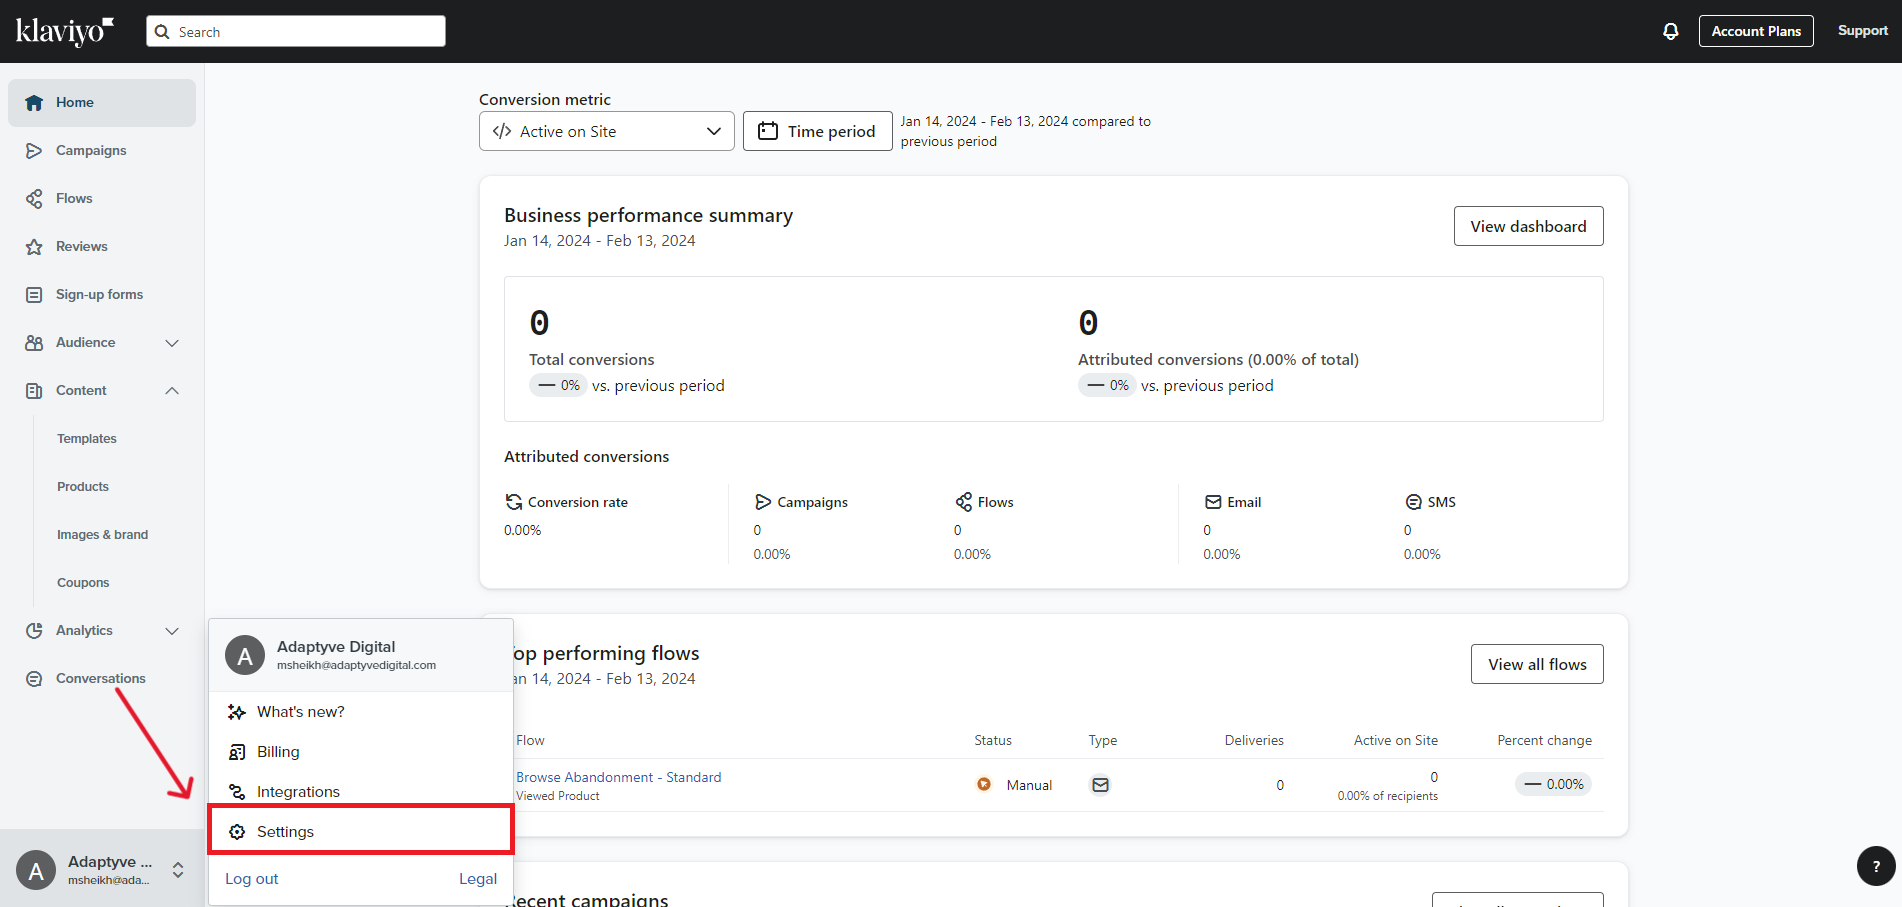
- Click on the bottom left corner of your Klaviyo account and choose "Settings".
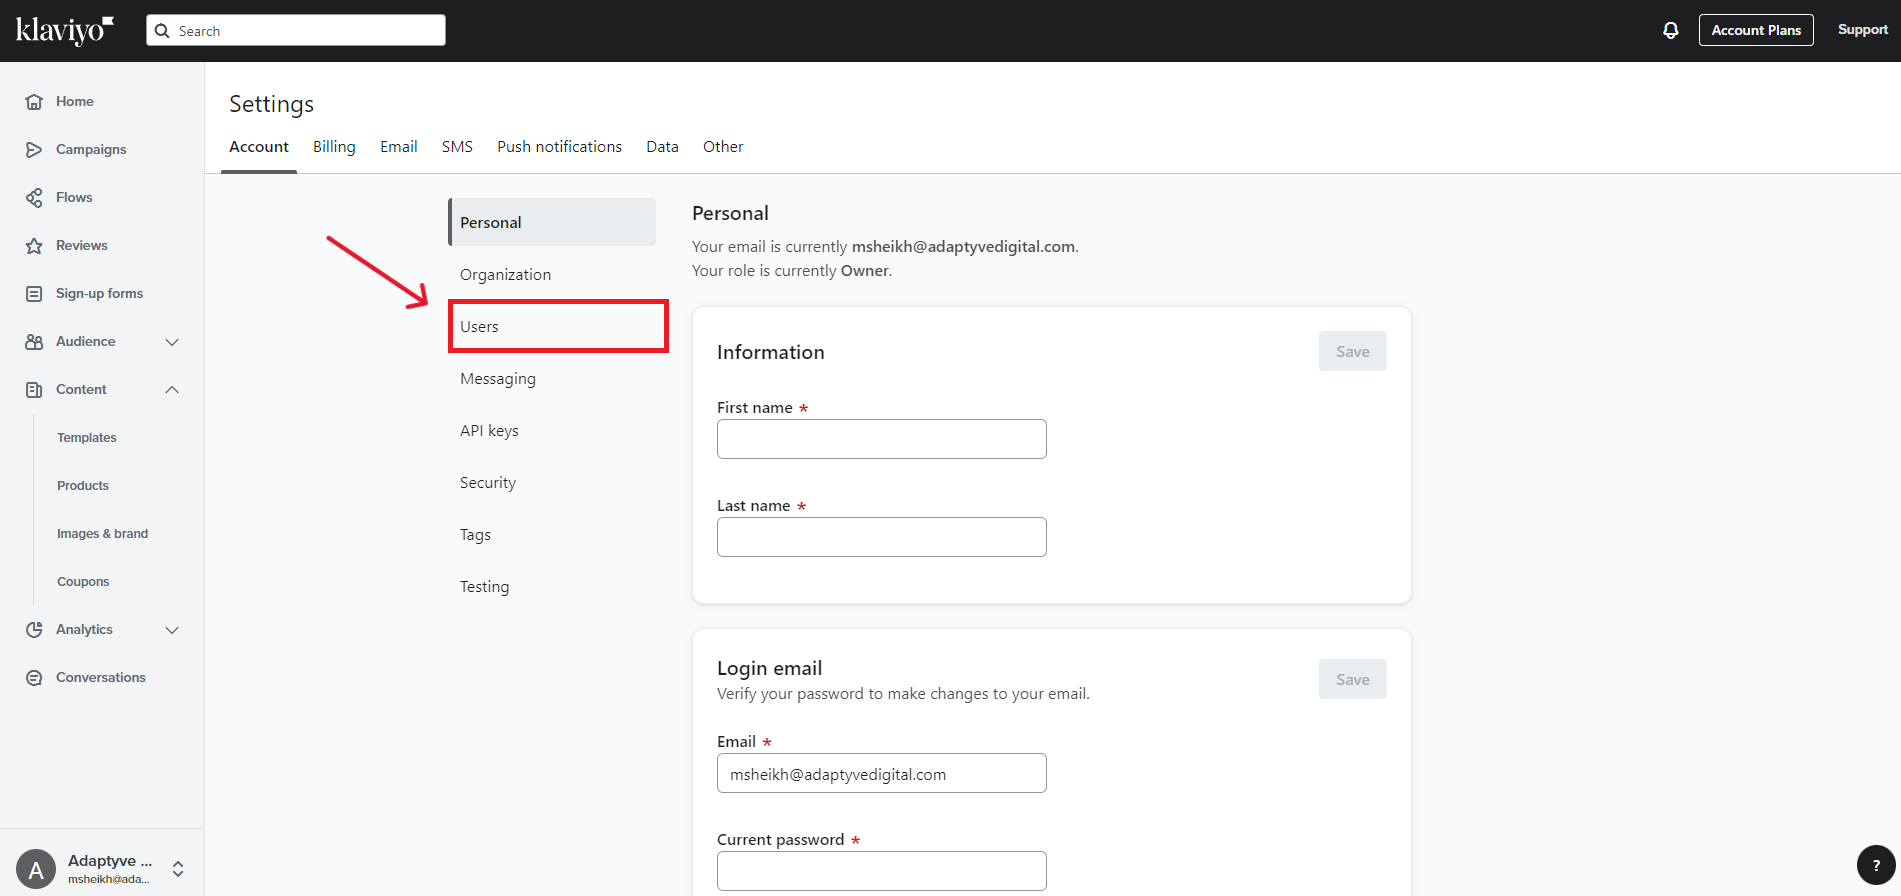
- Under the "Account" tab, click "Users".
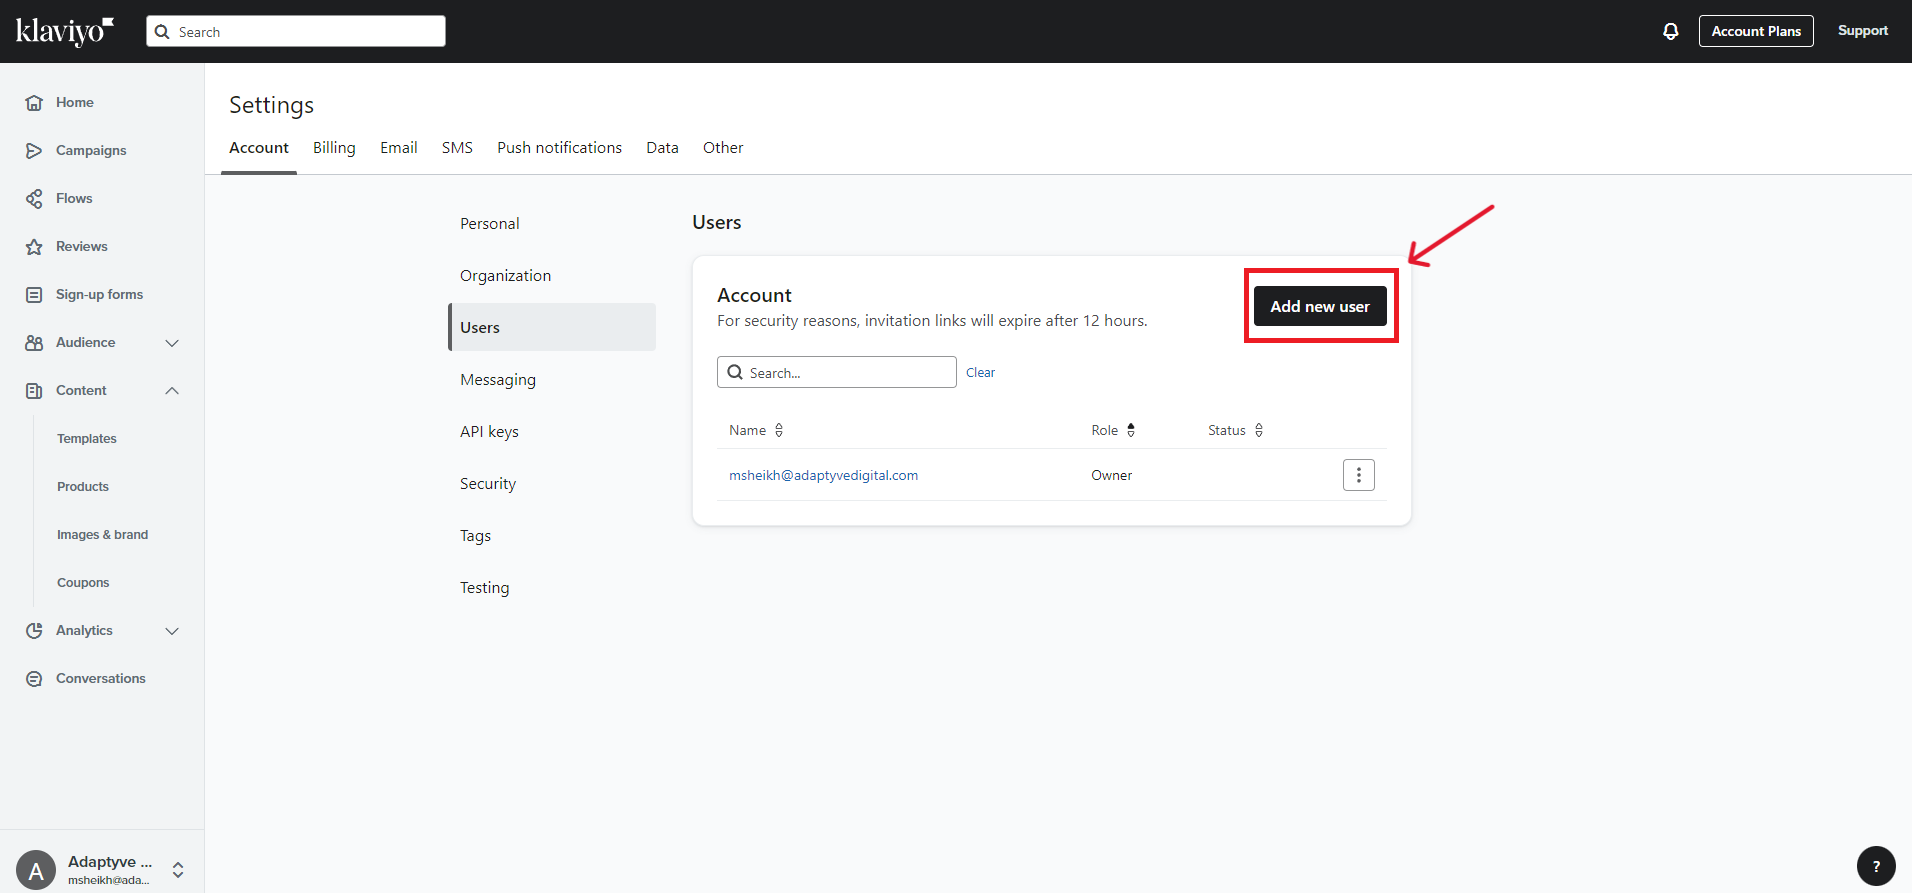
- Click on the "Add new user" button.
- Enter the email address for the new user you want to add, select the user's role from the dropdown menu, and click the "Add User" button.
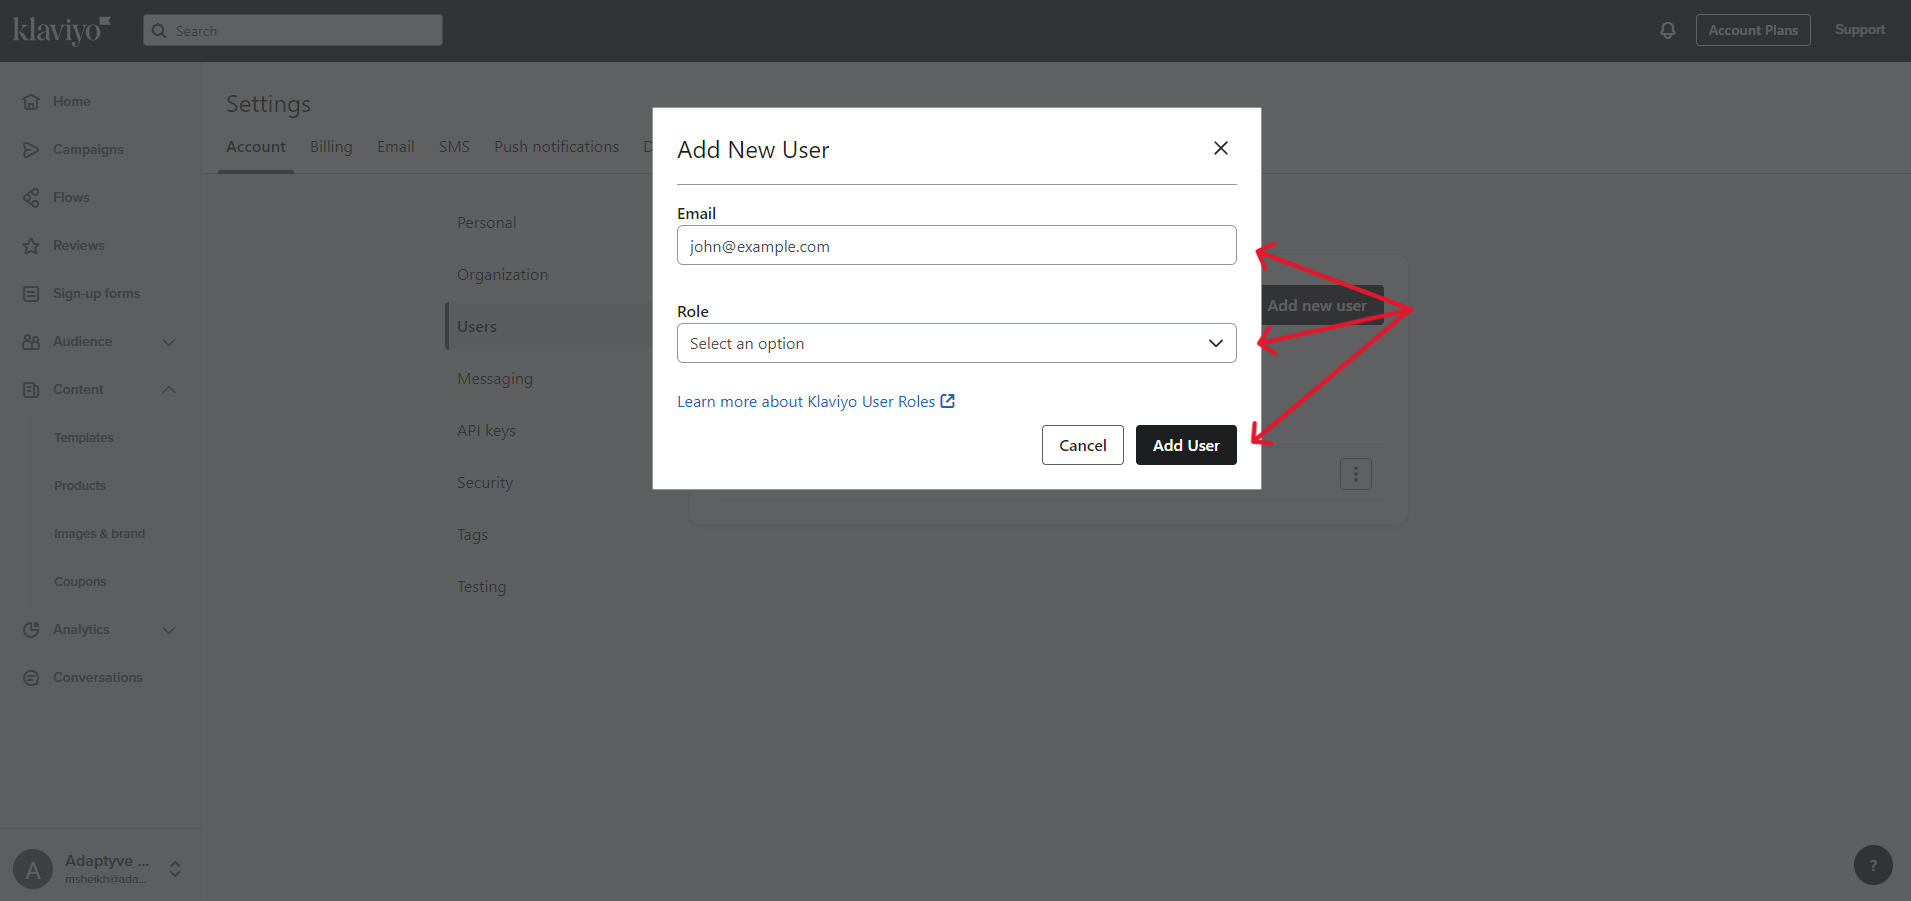
- Klaviyo will send an email to the new user.
Accepting a Klaviyo Account Invitation
When you bring a new user onboard, Klaviyo sends them an email. What's in that email and what they'll need to do next all boils down to whether or not they already have a Klaviyo login.
If the user already has a Klaviyo login, they'll get a New Account Invitation email. Here's what they need to do to join your account:
- Open the email and click the "Accept" button.
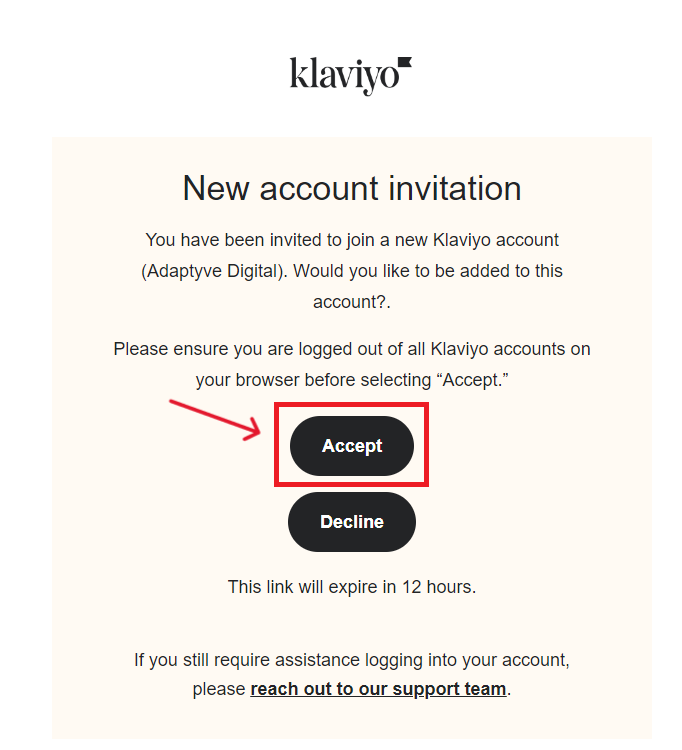
- Log in to Klaviyo using their existing login. Once logged in, they will have access to your account.
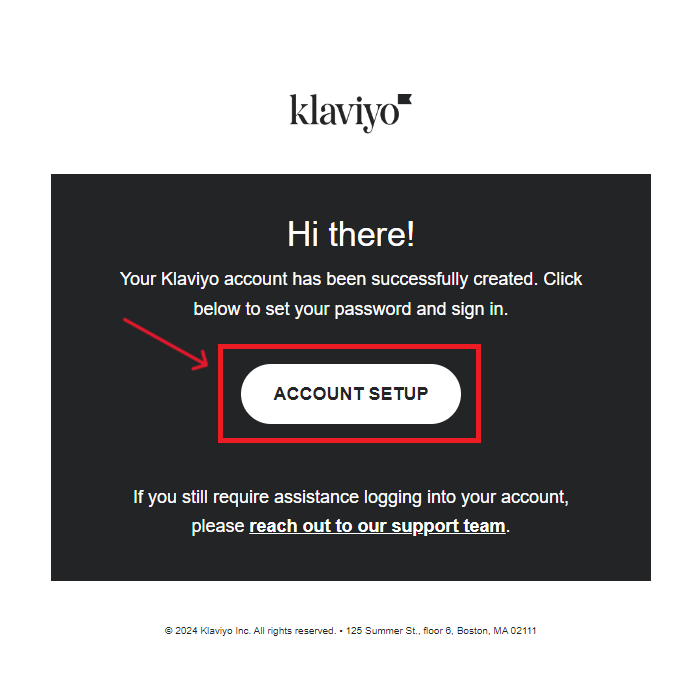
If the user doesn't already have a Klaviyo account, they'll get an Account Setup email from Klaviyo. Here's the steps they should take:
- Open the email and click the "Account Setup" button.
- Enter their name, set up a password, and click the "Create password" button.
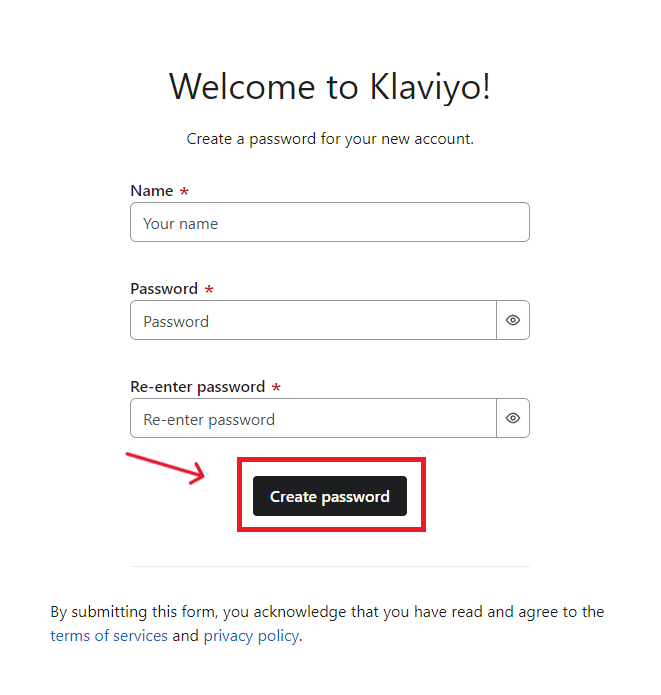
- Once logged in, they will have access to your account.
Resending an Expired Klaviyo Account Invitation
The Klaviyo account invitation email expires after 12 hours. But don't worry, if a new user lets you know their invite expired, there's a simple way to send it again. Here's how you do it:
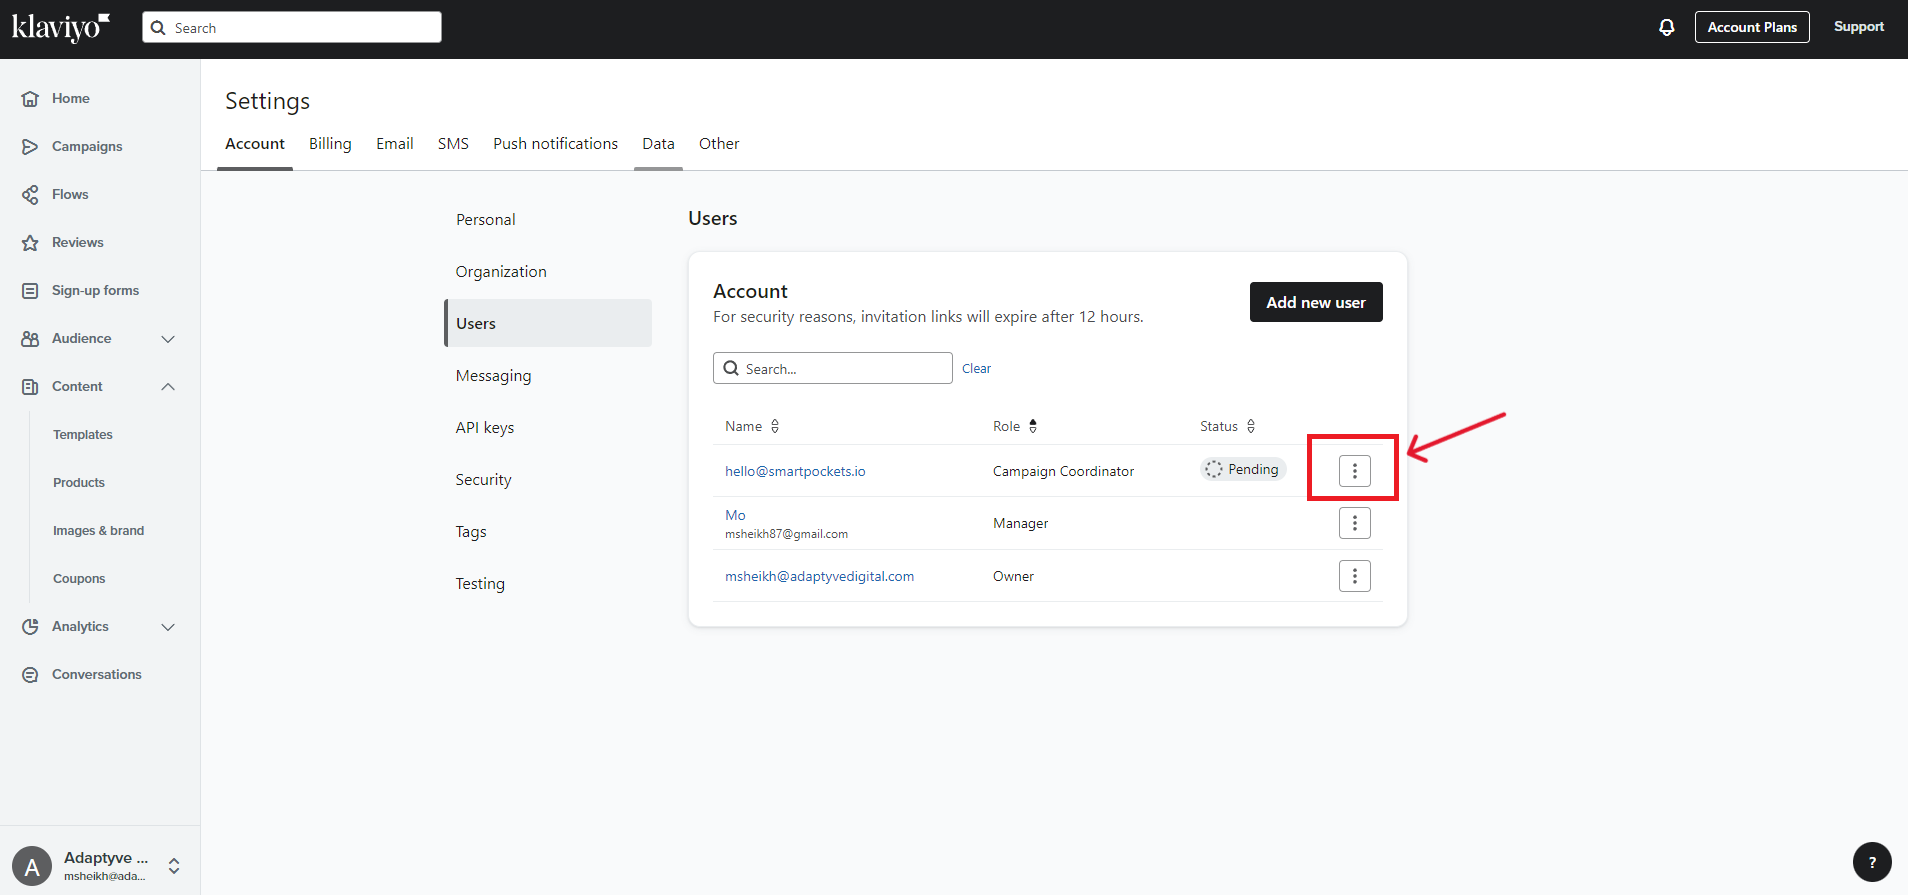
- In Klaviyo, click on the bottom left corner of your Klaviyo account and choose "Settings". Under the "Account" tab, click "Users".
- Click on the three vertical dots next to the user who needs the account invitation resent.
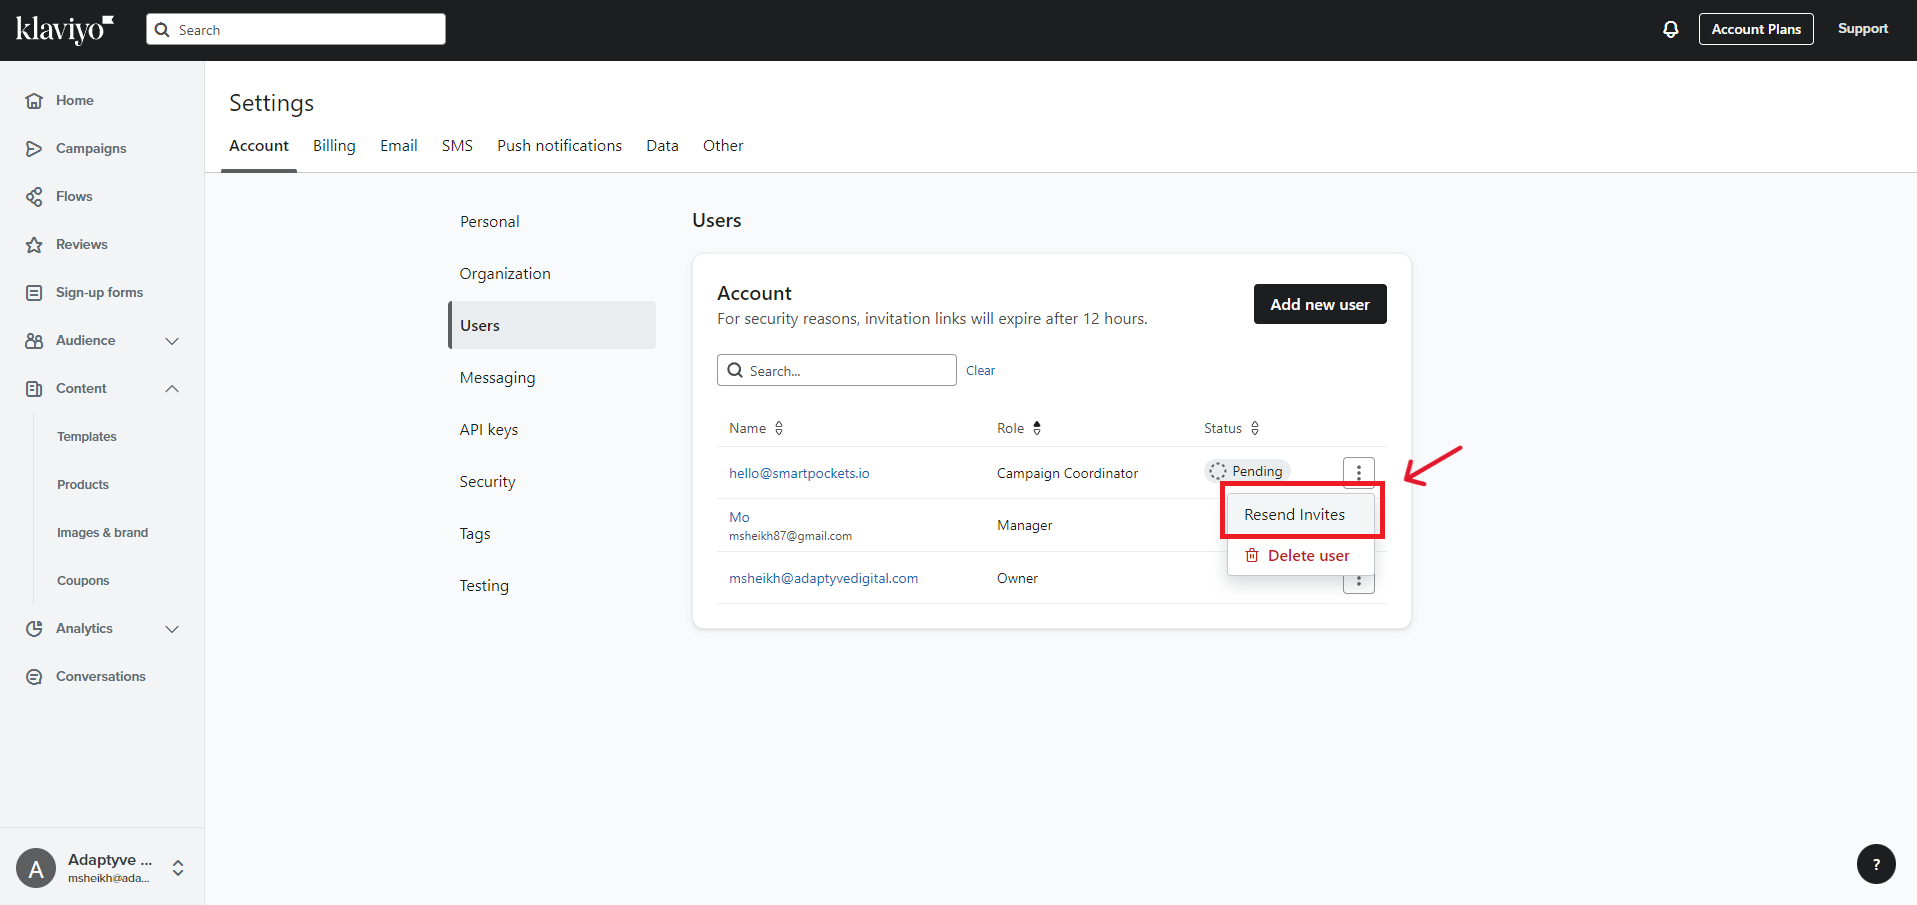
- Click the "Resend Invites" option.
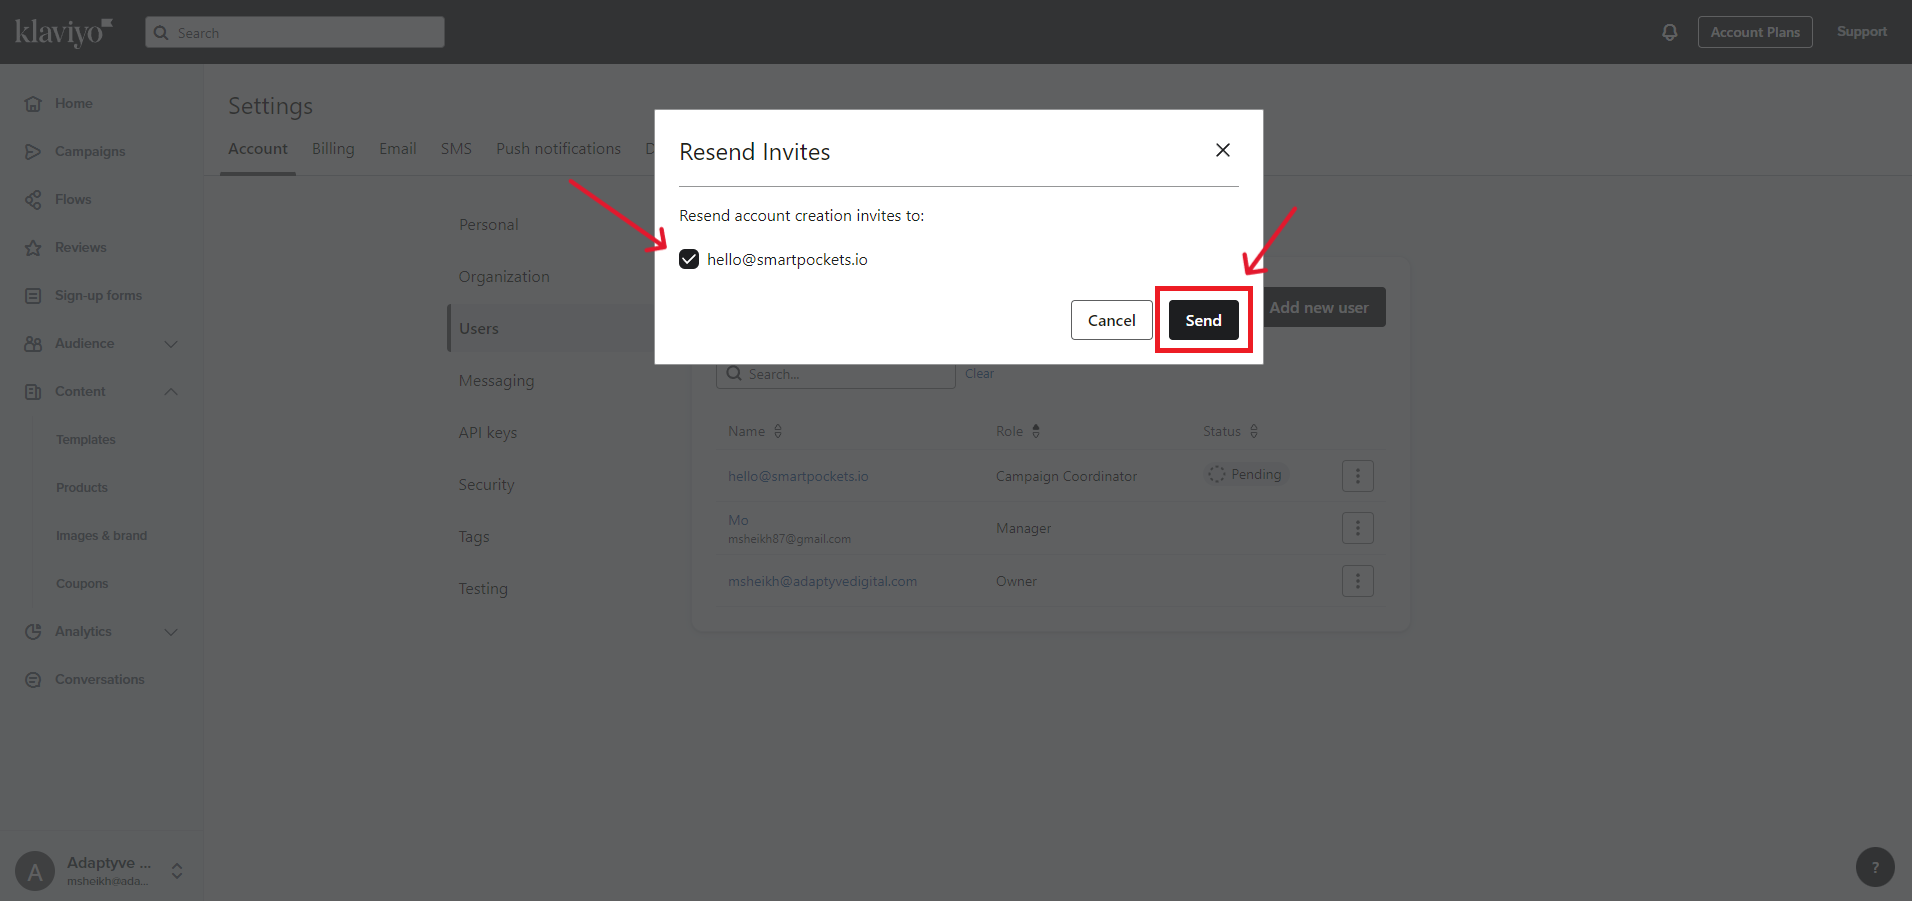
- Check the boxes next to the invites you want to resend, then click the "Send" button.
How to Update Roles for Existing Klaviyo Users
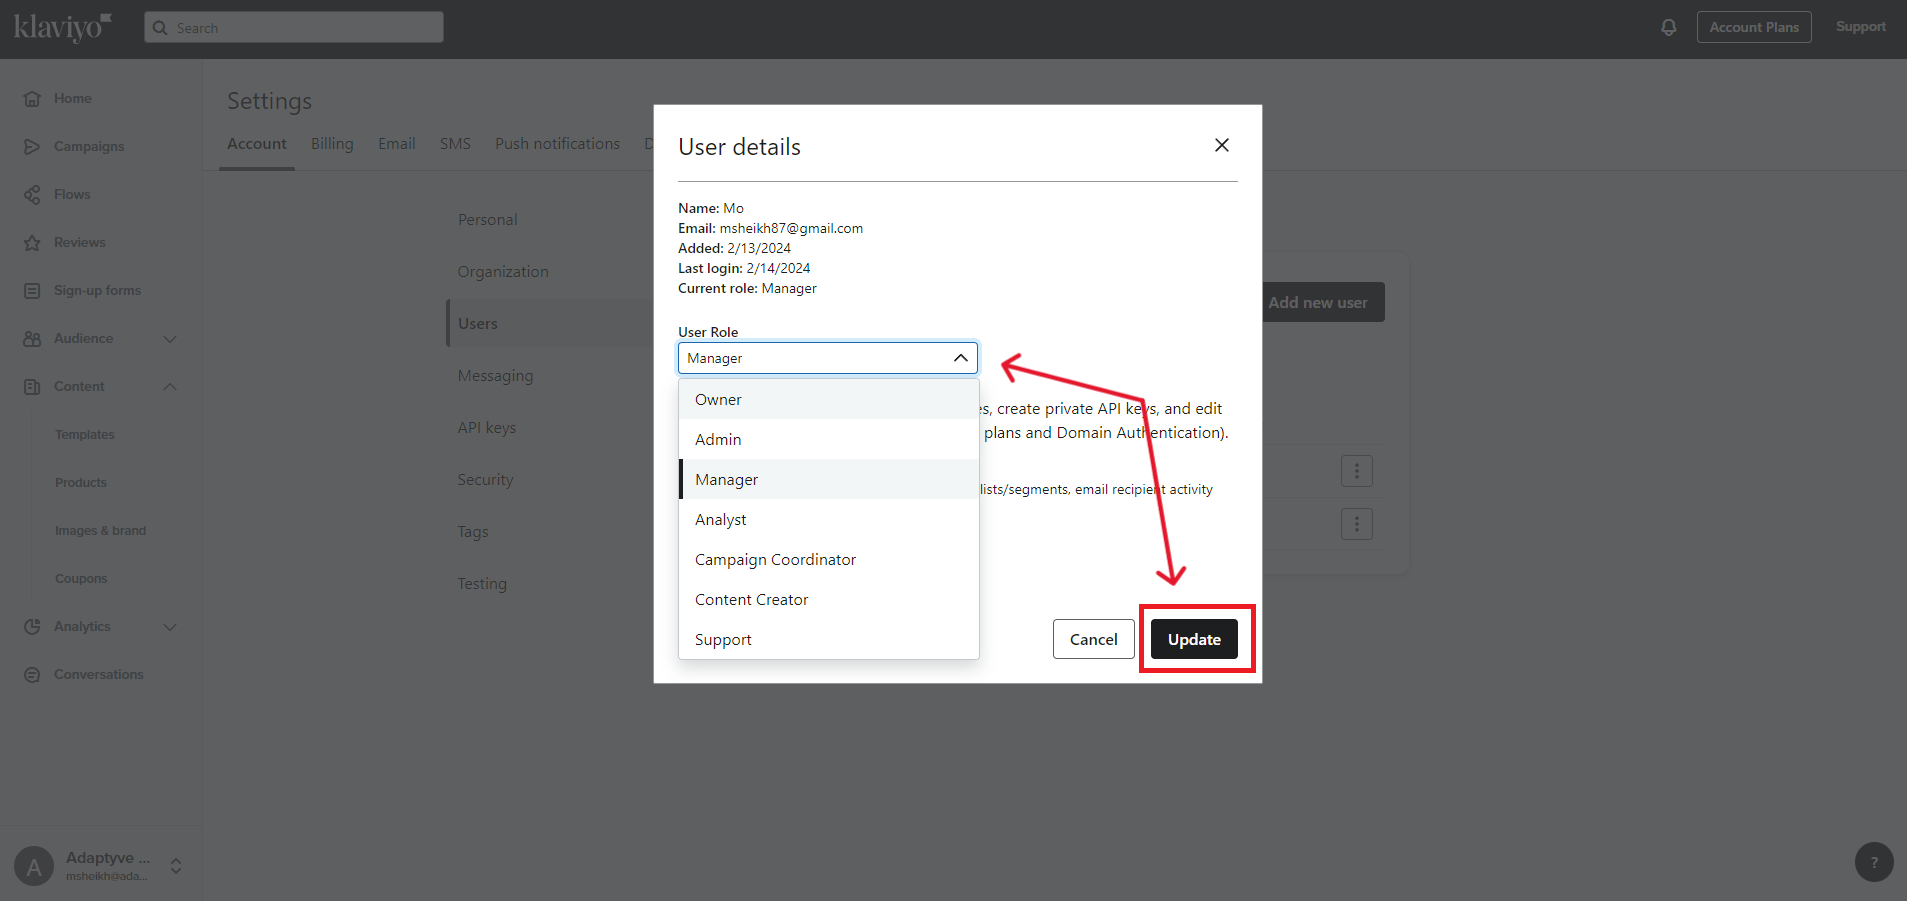
If you ever need to switch things up for the users who have access to your account, updating their roles is simple. Here's how you can update roles for existing users:
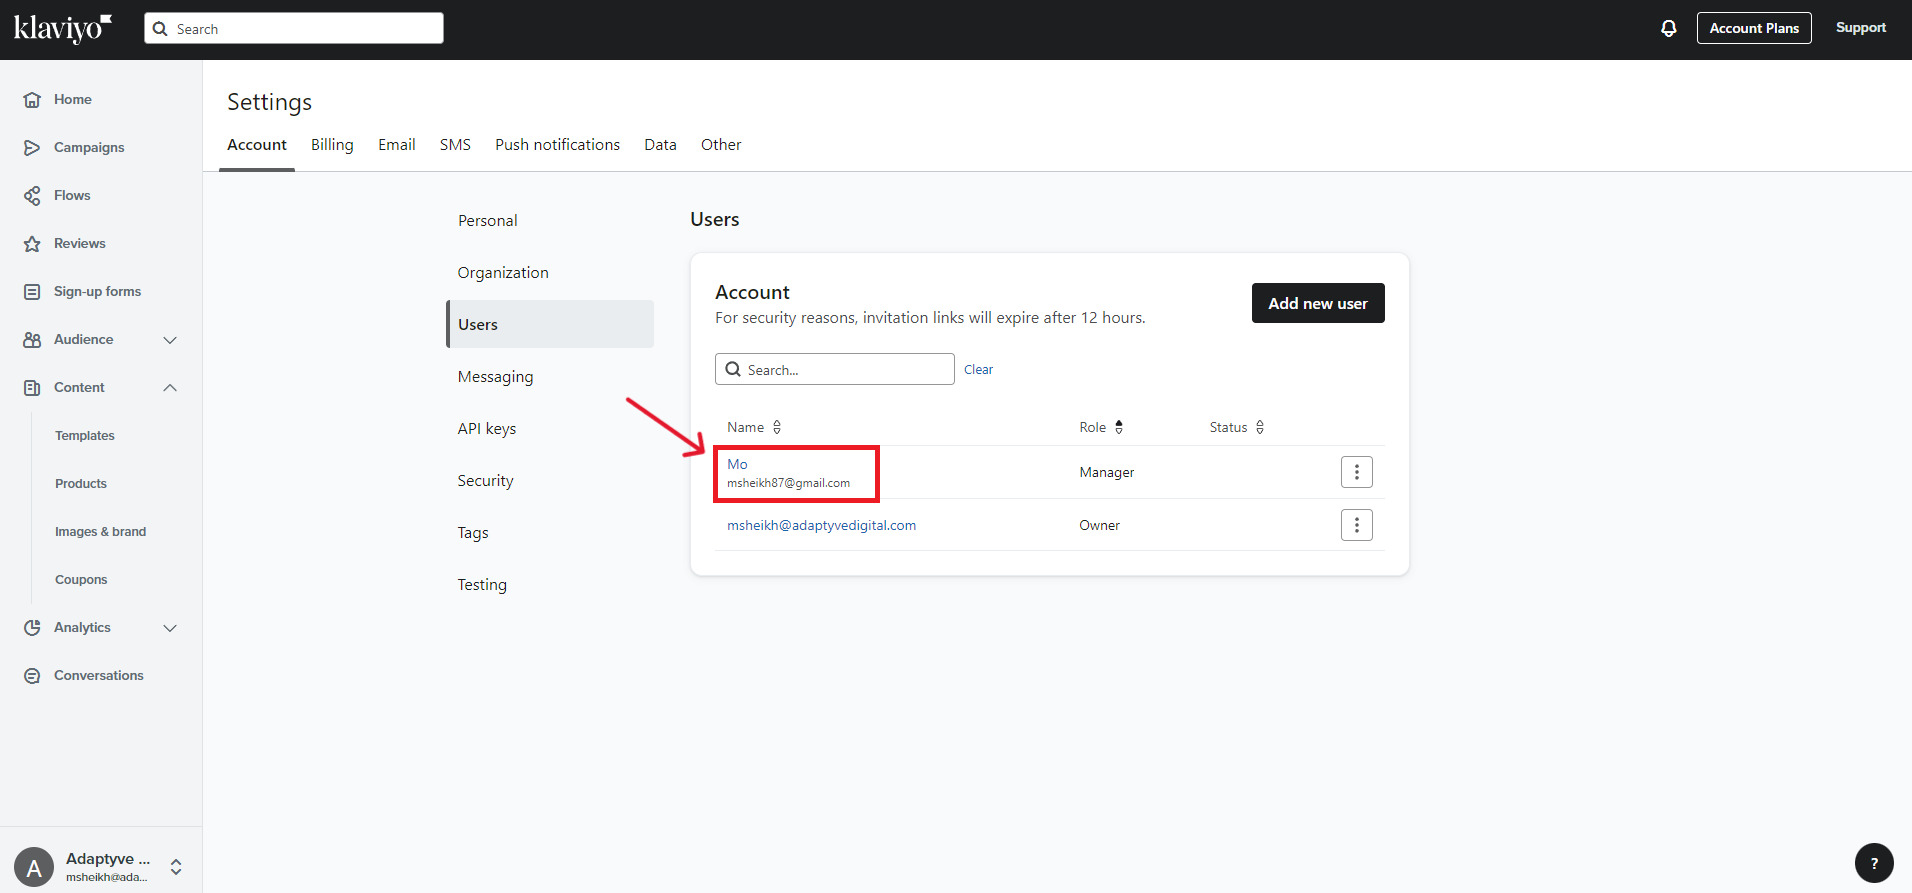
- In Klaviyo, click on the bottom left corner of your Klaviyo account and choose "Settings". Under the "Account" tab, click "Users".
- Click on the name of the user.
- Choose the new role from the dropdown, then click the "Update" button.
How to Remove Users from Klaviyo
Need to remove a user in Klaviyo? No worries, it's a simple process. Let's walk through how to remove users from your Klaviyo account with ease.
- In Klaviyo, click on the bottom left corner of your Klaviyo account and choose "Settings". Under the "Account" tab, click "Users".
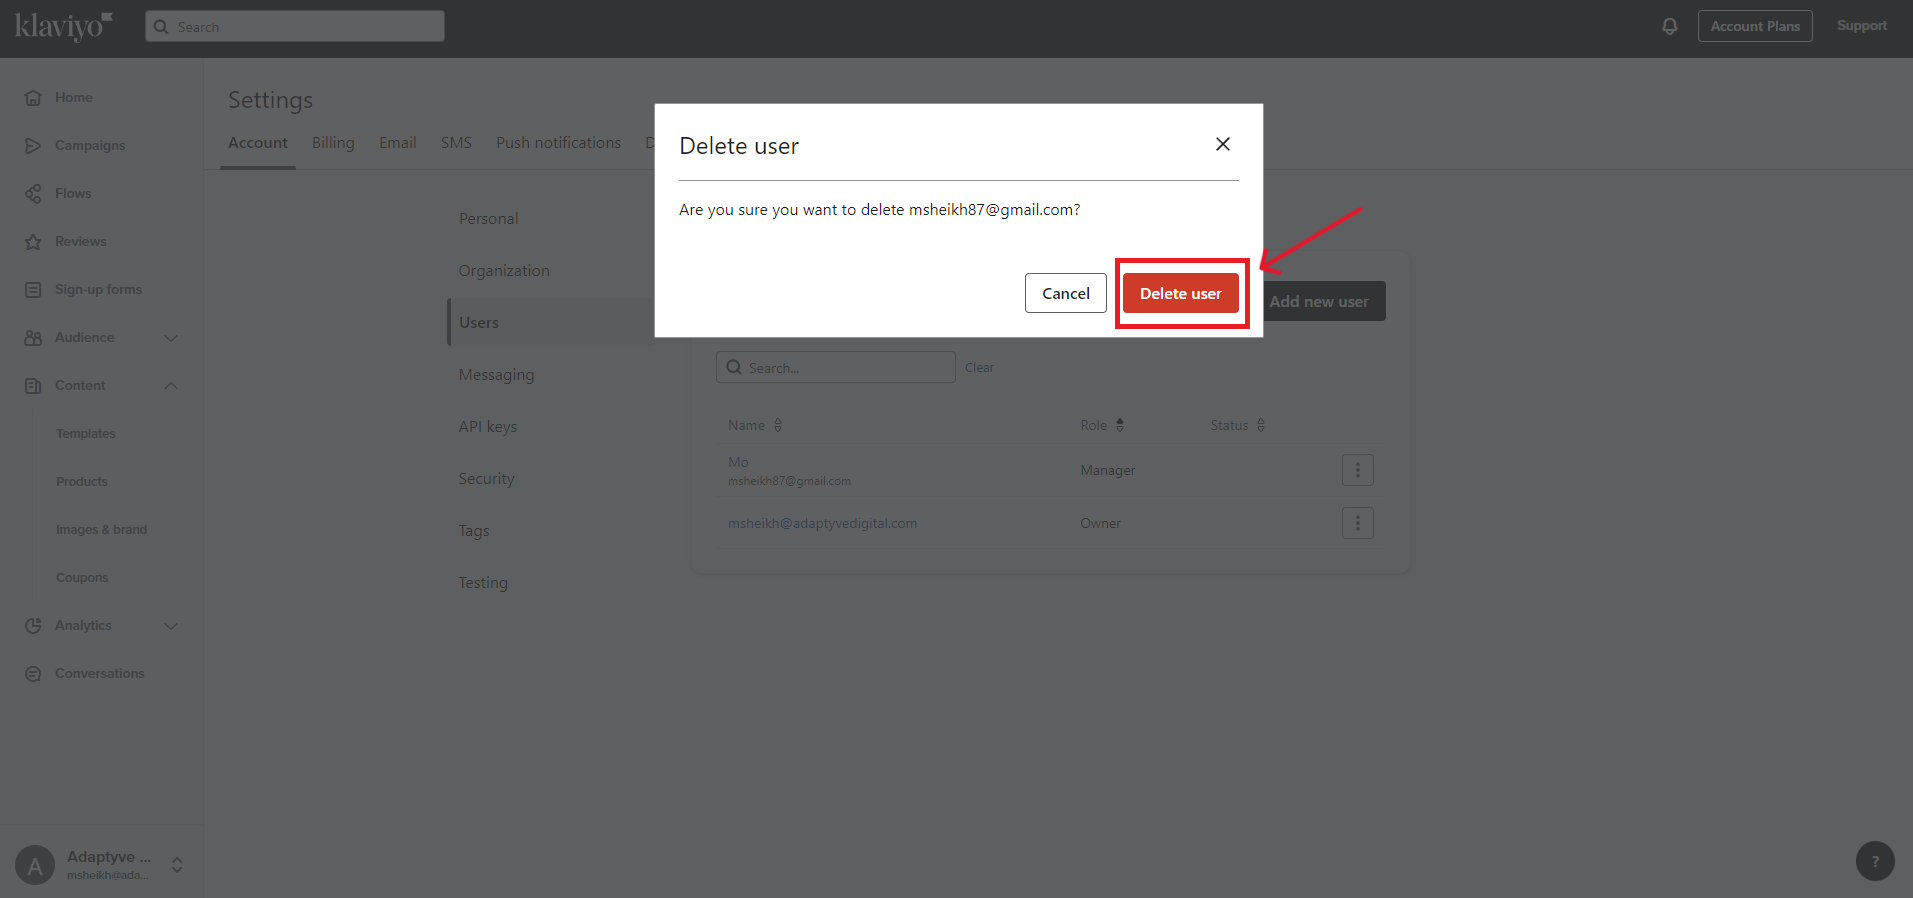
- Click on the three vertical dots next to the user you want to remove and click the "Delete User" option.
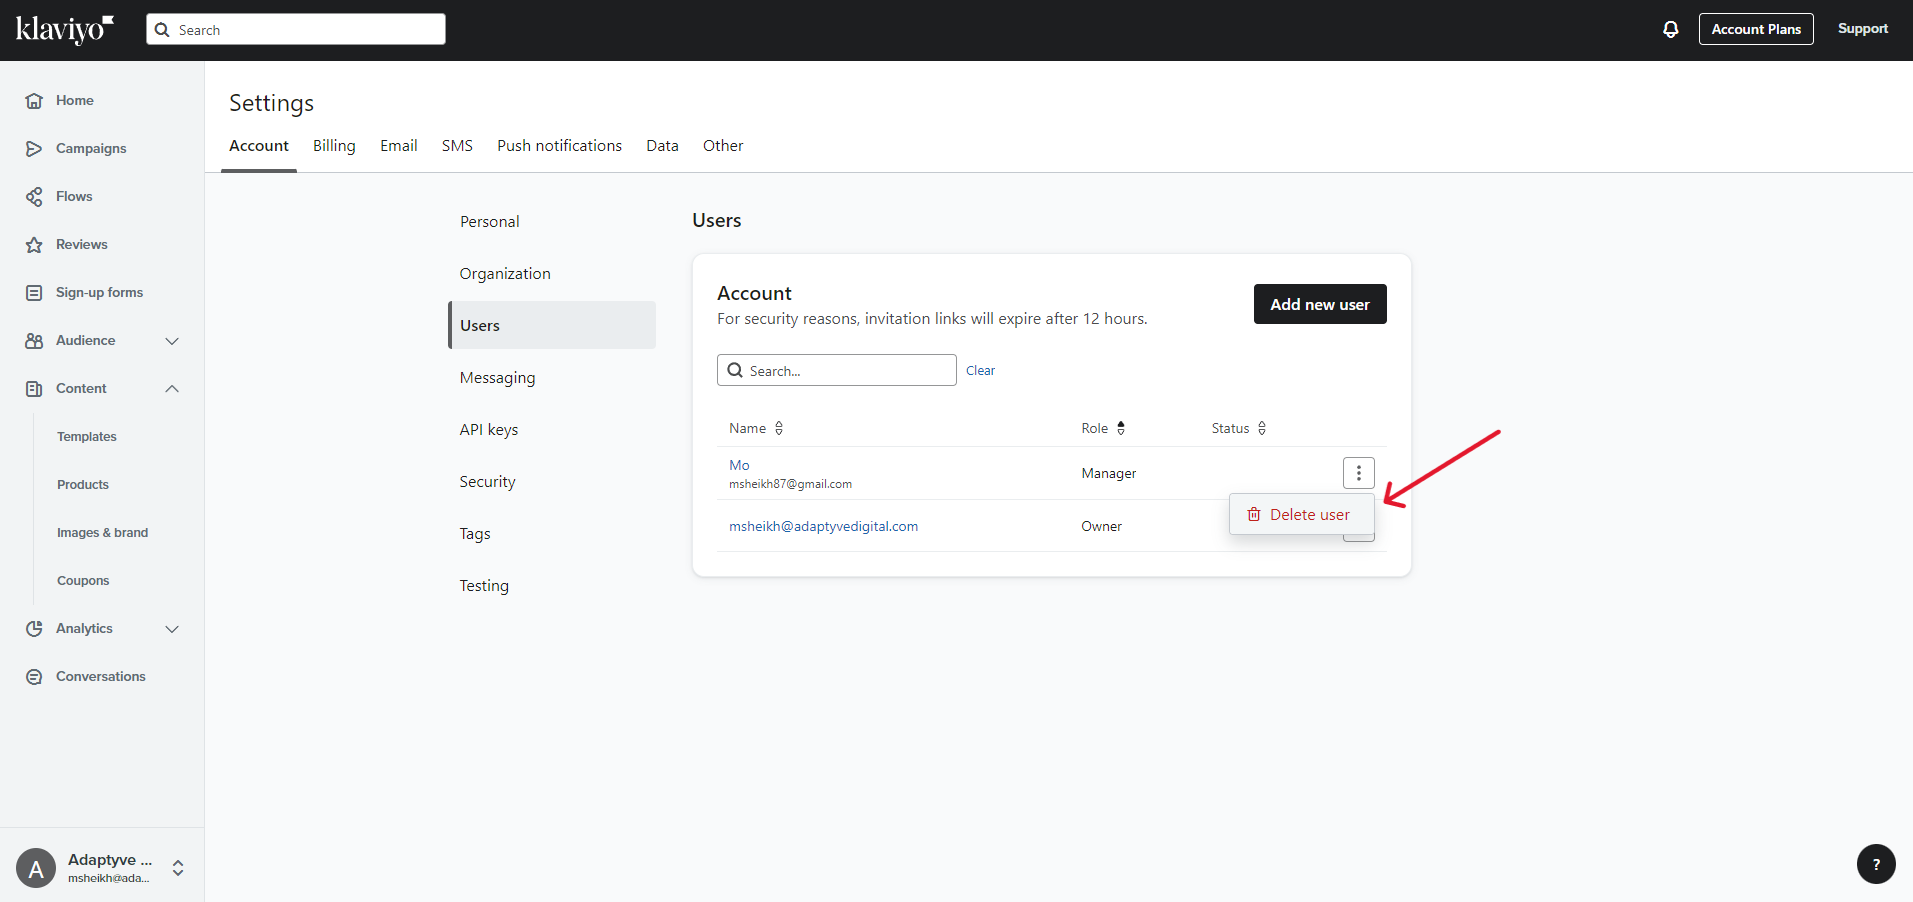
- In the confirmation box, click the "Delete user" button.
Final Thoughts
You've just become a pro at managing users in your Klaviyo account. Whether you're adding new team members, updating roles, or bidding farewell to old ones, you've got the tools and knowledge to keep your email marketing efforts running smoothly.
Remember, effective user management is key to maximizing efficiency and collaboration within your team. So, take what you've learned here and apply it to your Klaviyo account with confidence. And if you ever find yourself in need of a refresher, don't hesitate to bookmark and revisit this guide. We're here to support you every step of the way on your email marketing journey.
Now that you know how to manage users in Klaviyo, be sure to add Klaviyo to your Shopify store.
