QuickBooks is a popular accounting software used by small businesses. If you run an e-commerce store, you can use QuickBooks to track your Shopify sales and expenses. Integrating Shopify with Quickbooks Online may seem intimidating but in this article, we'll show you how to record Shopify sales in QuickBooks step by step.
If you have any questions about syncing your Shopify sales to your Quickbooks account throughout the article, feel free to reach out to us!
Table of Contents
- Step 1 - Install the Quickbooks Online app in your Shopify dashboard
- Step 2 - Connect your Shopify store to your Quickbooks Online account
- Step 3 - Configure the integration
- Step 4 - Setup order sync automation
- Step 4a - Setup Order Sync
- Step 4b - Setup Payout Sync
- Step 5 - Sync New Products
- Step 6 - Turn Integration On!
- Final Thoughts
Step 1 - Install the Quickbooks Online app in your Shopify dashboard
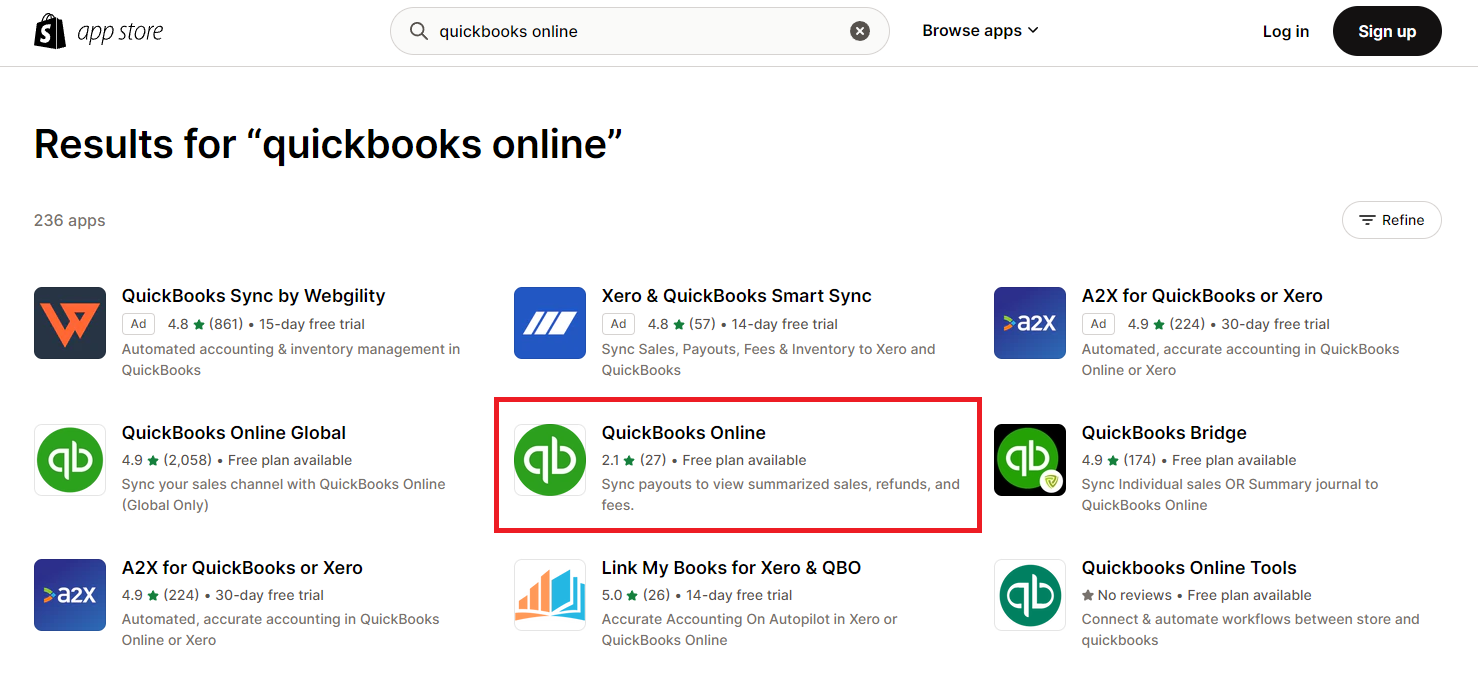
Log in to your Shopify account and go to the App Directory by clicking on "Apps" on the left side menu.
Search the Shopify app directory for "Quickbooks Online." Find the app with the Quickbooks logo by Intuit and click it.
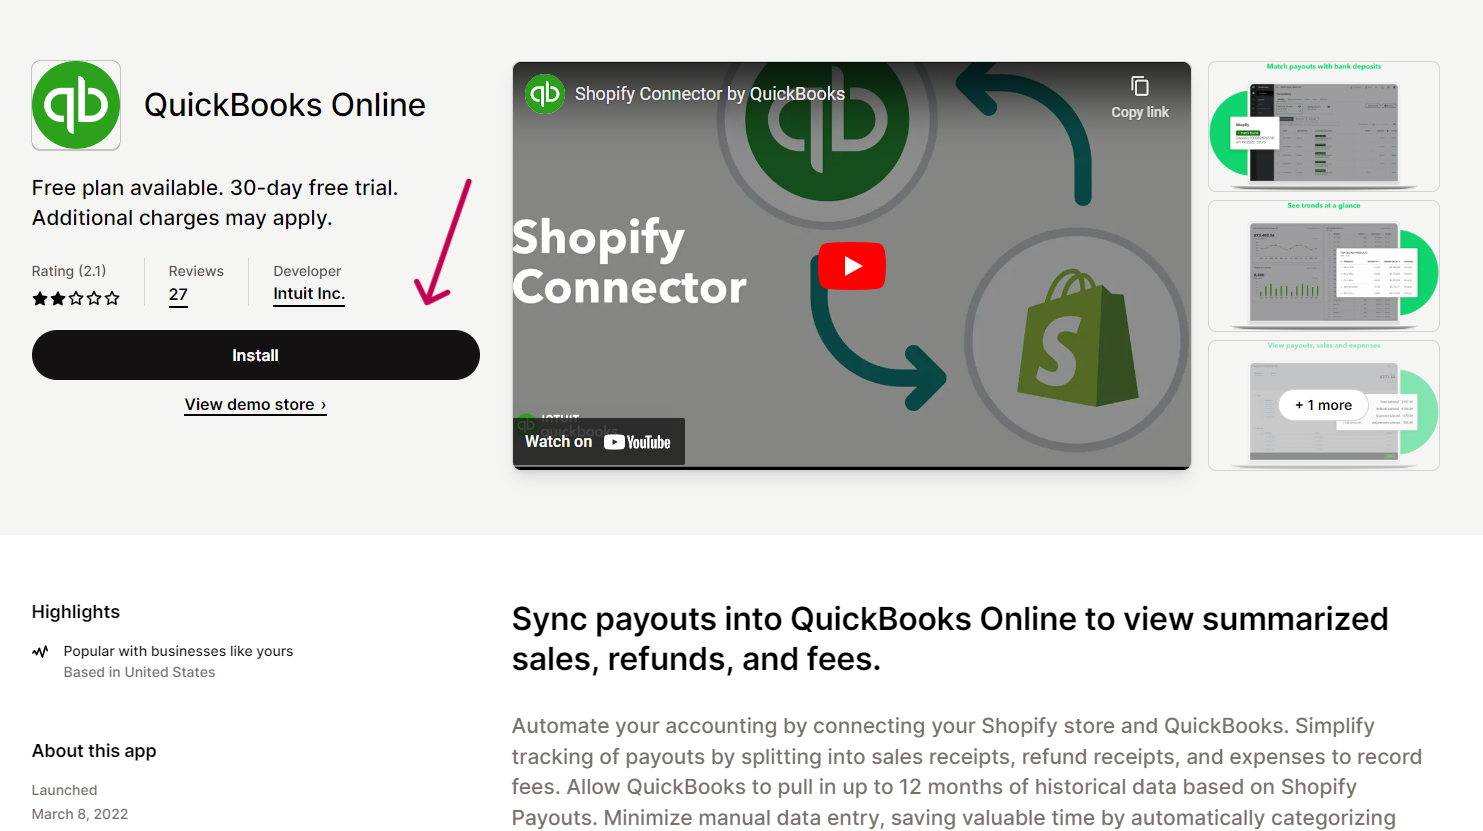
From the app page, click "Install."
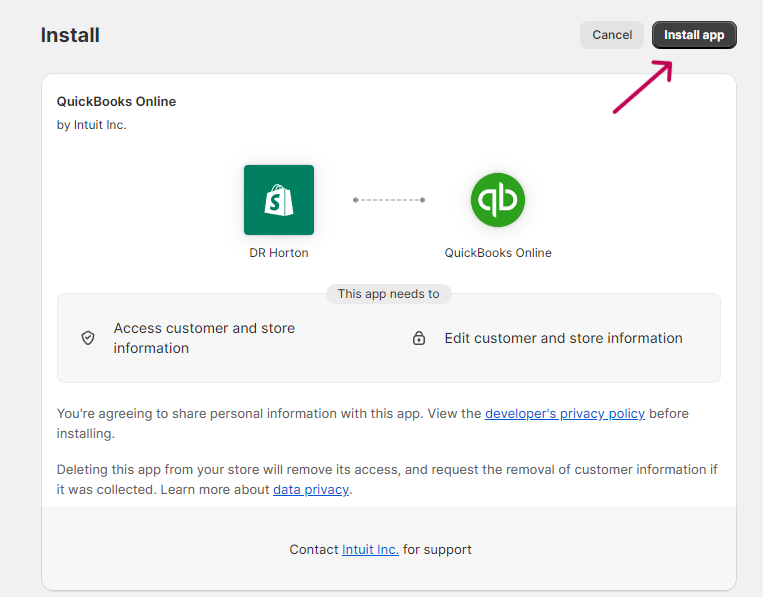
Install the app by clicking "Install app" in the top right corner.
Step 2 - Connect your Shopify store to your Quickbooks Online account
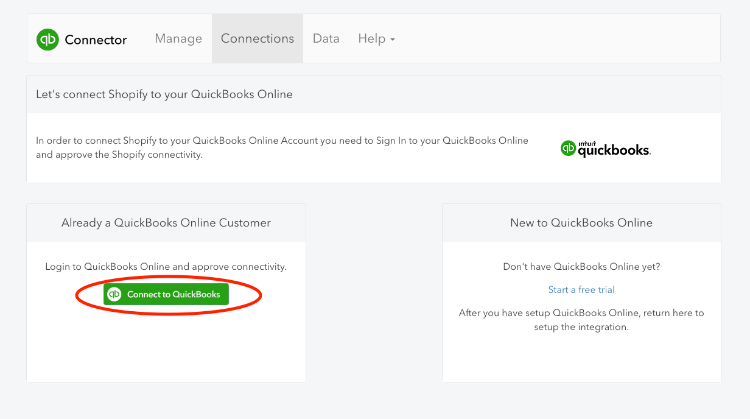
After the app finishes installing you will land on a connection screen. This is where you will give permission for your Shopify store to connect securely to your QuickBooks account.
Click on the green "Connect to Quickbooks" button.

Log in to your Quickbooks Online account with the same credentials you normally use. If you always sign in with Google, choose that option.
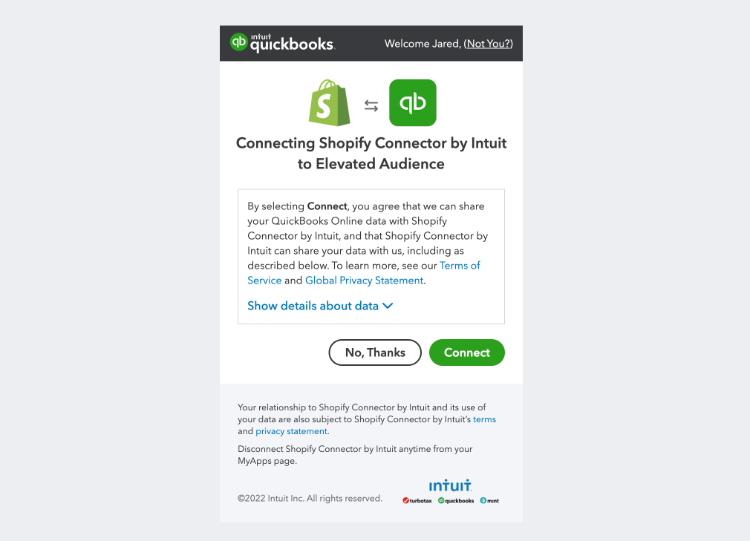
Click the green "Connect" button to confirm the connection.
Step 3 - Configure the integration
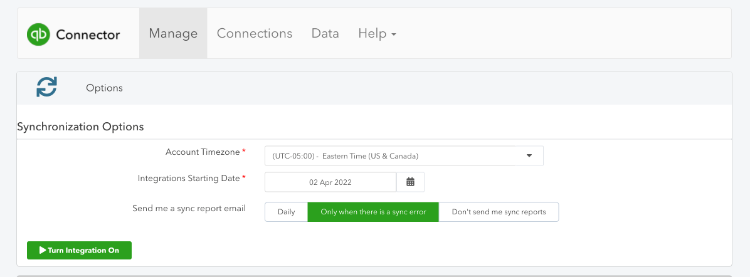
First, make sure your timezone is set correctly to match your Quickbooks Online account. This will prevent discrepancies in the future.
Next, set your Integrations Starting Date. This can be a date in the past and is the first day of transactions you want to sync.
Finally, decide when you want to receive sync reports by email.
Step 4 - Setup order sync automation
The decisions you make from this point forward will depend on your unique business and what you want to track in Shopify. For example, you may want to track all transactions from Shopify sales or only some of them.

It is highly recommended that you choose only ONE of the above options. Configuring your store to sync both orders and payouts could result in unnecessary duplicates.
Syncing individual Shopify sales in Quickbooks is more elaborate and sends a lot more information to your accounting software. As an experienced ecommerce store owner, this will help you make the best decisions to maximize profits.
On the other hand, if you're just starting your entrepreneurial journey you may want to simplify your ecommerce accounting and only sync payouts to reconcile your bank accounts and monitor cash flow.
Jump straight to Step 4b - Setup Payout Sync
Step 4a - Setup Order Sync
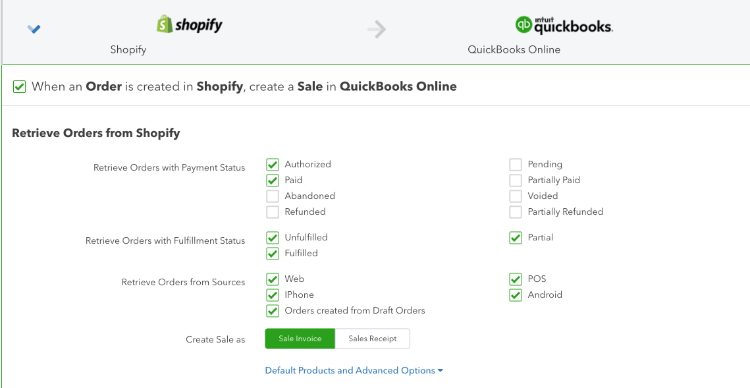
Retrieve Order with Payment Status - Check the boxes you want to trigger a sync to your Quickbooks account. Authorized and Paid are checked by default. You may want to also include Refunded, Partially Refunded, and Voided transactions so you can reconcile your income with your bank accounts.
Retrieve Orders with Fulfillment Status - This is a 2nd layer filter. If all the conditions in the payment status section are met then the app will check the fulfillment status settings. For example, if you uncheck the box next to "Unfulfilled" an order won't sync to your Quickbooks Online account until the status of the order is "Fulfilled" or "Partial" even if it is paid in full.
Retrieve Orders from Sources - A 3rd filter layer. Do you want all of your orders synced or just orders from certain sources?
Create Sale as - Select from 2 options: Sales Invoice or Sales Receipt.
According to the Quickbooks Blog:
"The main difference is that invoices are issued before a business has received payment from a customer, and a receipt is issued after payment has been collected.
An invoice is used when a business has completed a customer's order and needs to collect payment for the goods or services provided."
Read more about Sales Invoices vs. Sales Receipts to make the best decision for your business.
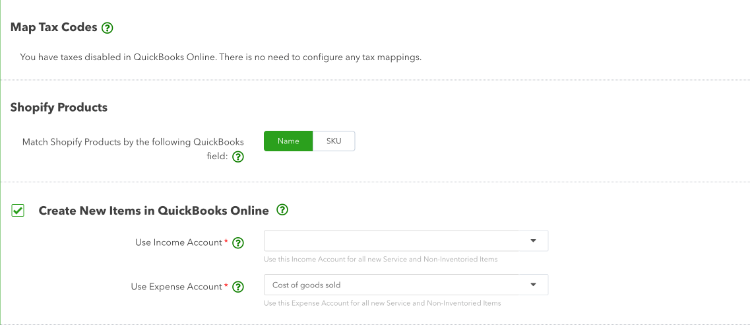
Map Tax Codes - If your Quickbooks Online account is configured to collect sales tax, this is where you will align the tax rates from your Shopify sales to your Quickbooks account.
Shopify Products - Determine how you want Shopify and Quickbooks Online to associate your products. Do you have a consistent naming system or do you use SKU numbers? This is critical if you want your inventory to be consistent across both platforms.
Create New Items In Quickbooks Online - If you would like new items automatically sent to QuickBooks Online, select this option. If not, all the products will still be matched by SKU/Code.
The Income Account will be the default income account assigned to all items that are Sold.
The Expense Account will be the default expense account assigned to all items that are Purchased. If you're using 3rd party integrations to fulfill orders or dropship products, this is how those purchase transactions are accounted for.
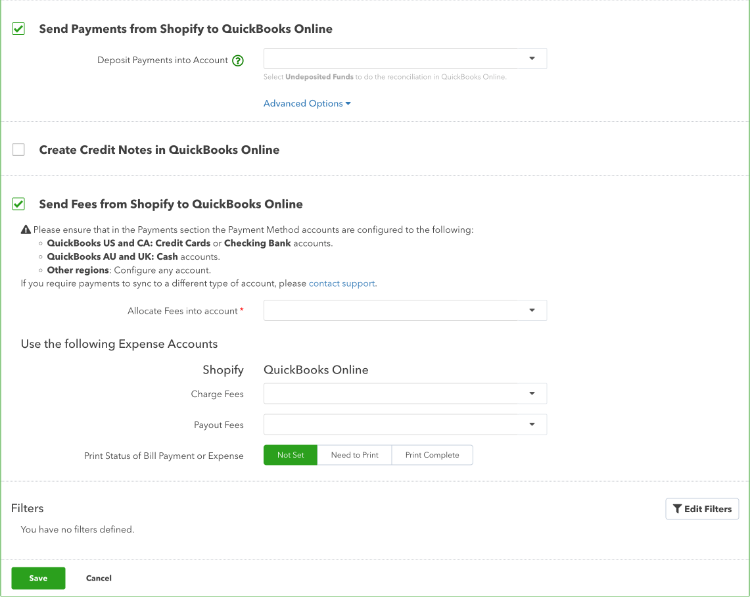
Send Payments from Shopify to Quickbooks Online - Here, you will decide if you want to log the individual Shopify payments associated with all your sales in your Quickbooks Account.
You will most likely select the actual bank account where your payouts are deposited. This is usually your primary business checking account.
If you want to reconcile your Shopify payouts within Quickbooks, you can select "Undeposited Funds" or another clearing account you have already set up.
Under Advanced Options, you will find mapping methods. If you also use Paypal or Apple Pay as payment processors, you can map those transactions to their respective accounts.
Create Credit Notes in Quickbooks Online - By default, all refunds will be linked to the payment accounts in the section above.
Send Fees from Shopify to Quickbooks Online - I highly recommend you set this up because monitoring fees is a major part of ecommerce success.
The first section is required and is the default expense account for all Shopify fees. Most likely, you will select something like "Bank fees and service charges" here.
You can further categorize your fee expenses by setting additional expense accounts to correlate with charge fees and payout fees.
Don't forget to save your work!
Step 4b - Setup Payout Sync
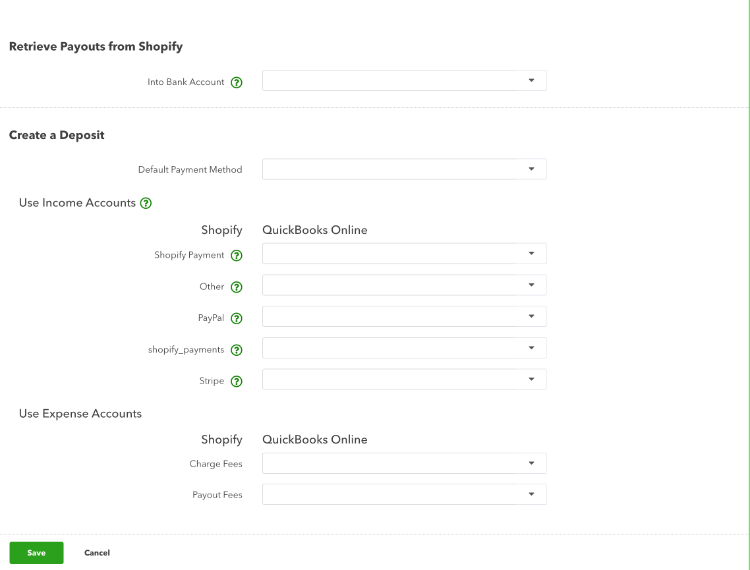
Retrieve Payouts from Shopify - In the "Into Bank Account" field, select the bank account where your Shopify bank deposits are sent. If you don't see your account listed, check to make sure you have it set up properly in Quickbooks.
Depending on how you have your bank feeds configuration setup and your payout schedule, it could also be a holding account or monthly journal entry. You may want to consult with a bookkeeping professional or accountant if you are unsure.
Create a Deposit - Deposits help you understand what payment methods your customers are using. In this section, you can attribute different payment methods to different income accounts giving you the option to run more elaborate reports in the future.
Use Expense Accounts - This is the Quickbooks expense account where you want to record the fees charged to Shopify sellers for payment processing. You will most likely select "bank fees and service charges" here.
Don't forget to save your work!
Step 5 - Sync New Products
As an entrepreneur, you know time is money! Take the extra 5 minutes right now to complete this last setup option to save yourself hours of time by not having to create new products twice.

Match Shopify Products by the following Quickbooks field - You have to make a decision that will be hard to change in the future. The option you select here will be how product and inventory items are matched in the user interface across both platforms.
If every product you offer has a unique name and you don't have a ton of variants for each product, going by name may be a great option.
On the other hand, with a complex inventory of items and variants, investing time in using a SKU system can save you time and aggravation down the road.
Use Income Account - Here, match the Income Account you use for new product sales. Most stores will keep the default of Sales.
Use Expense Account - Here, match the Expense Account you want to attribute to products you purchase through Shopify. If you're using 3rd party integrations to fulfill orders or dropship products this is how those purchase transactions are accounted for.
Don't forget to click save!
Step 6 - Turn Integration On!
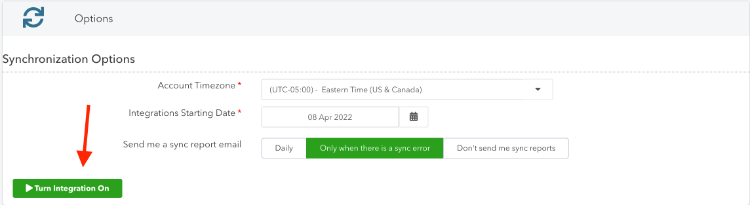
Congratulations, you made it! The final step is to click the green "Turn Integration On" button and allow the magic of background sync automation to send all your revenue and sales to your Quickbooks bank feed.
The feed will sync immediately and then hourly moving forward.
Final Thoughts
Integrating your e-commerce store with your accounting software will give you the tools and data you need to make the best possible decisions for your business. You'd be surprised to know how valuable it is to understand how much of your income comes from credit card payments vs. Paypal.
