Online shopping has seen a boom like never before due to social distancing from COVID, and many businesses, both small and large, have experienced the benefits. Unlike traditional brick-and-mortar retail, the online shopping experience can double or triple your reach to shoppers worldwide.
The realization has hit that you aren't limited to just one way of selling. Beyond that, selling online isn't limited to your website either. The integrations that storefronts like Shopify and social media platforms offer are game-changers for anyone looking to sell their products or services.
Shopify can connect the products on your storefront to your Instagram profile, allowing customers to view them directly on your social media posts. Your posts drive your social media followers to your website for quick and easy purchase options.
Clicking "add to cart" has never been easier. Business owners need to take advantage of all these (not so new) options.
IMPORTANT: You need a Facebook business page. Your Instagram profile also needs to be set up as a Professional Account.
If you have any questions or need help integrating your Shopify store with Instagram, feel free to reach out to us!
Table of Contents
- How to Integrate Shopify with Instagram
- Step 1 - Confirm the Eligibility of Your Brand and Products
- Step 2 - Convert Your Instagram Profile to a Professional Account
- Step 3 - Add Instagram Shopping to Your Facebook Sales Channel
- Step 4 - Add Your Product Catalog to Instagram
- Step 5 - Changing the Product Descriptions
- Integrating Shopify with Instagram has Massive Potential for Your Business!
How to Integrate Shopify with Instagram
Follow these five easy steps to integrate your Instagram profile with your Shopify store.
Step 1 - Confirm the Eligibility of Your Brand and Products
First, you want to ensure your products comply with Instagram's policies. Before you go any further, take a look at Instagram's Commerce Eligibility Requirements.
You also need your own custom site domain, which shouldn't be a problem for anyone with a Shopify store.
Finally, see that your country is a supported market for the service.
Step 2 - Convert Your Instagram Profile to a Professional Account
If your Instagram profile is already set up as a Professional Account, you can skip to step 3.
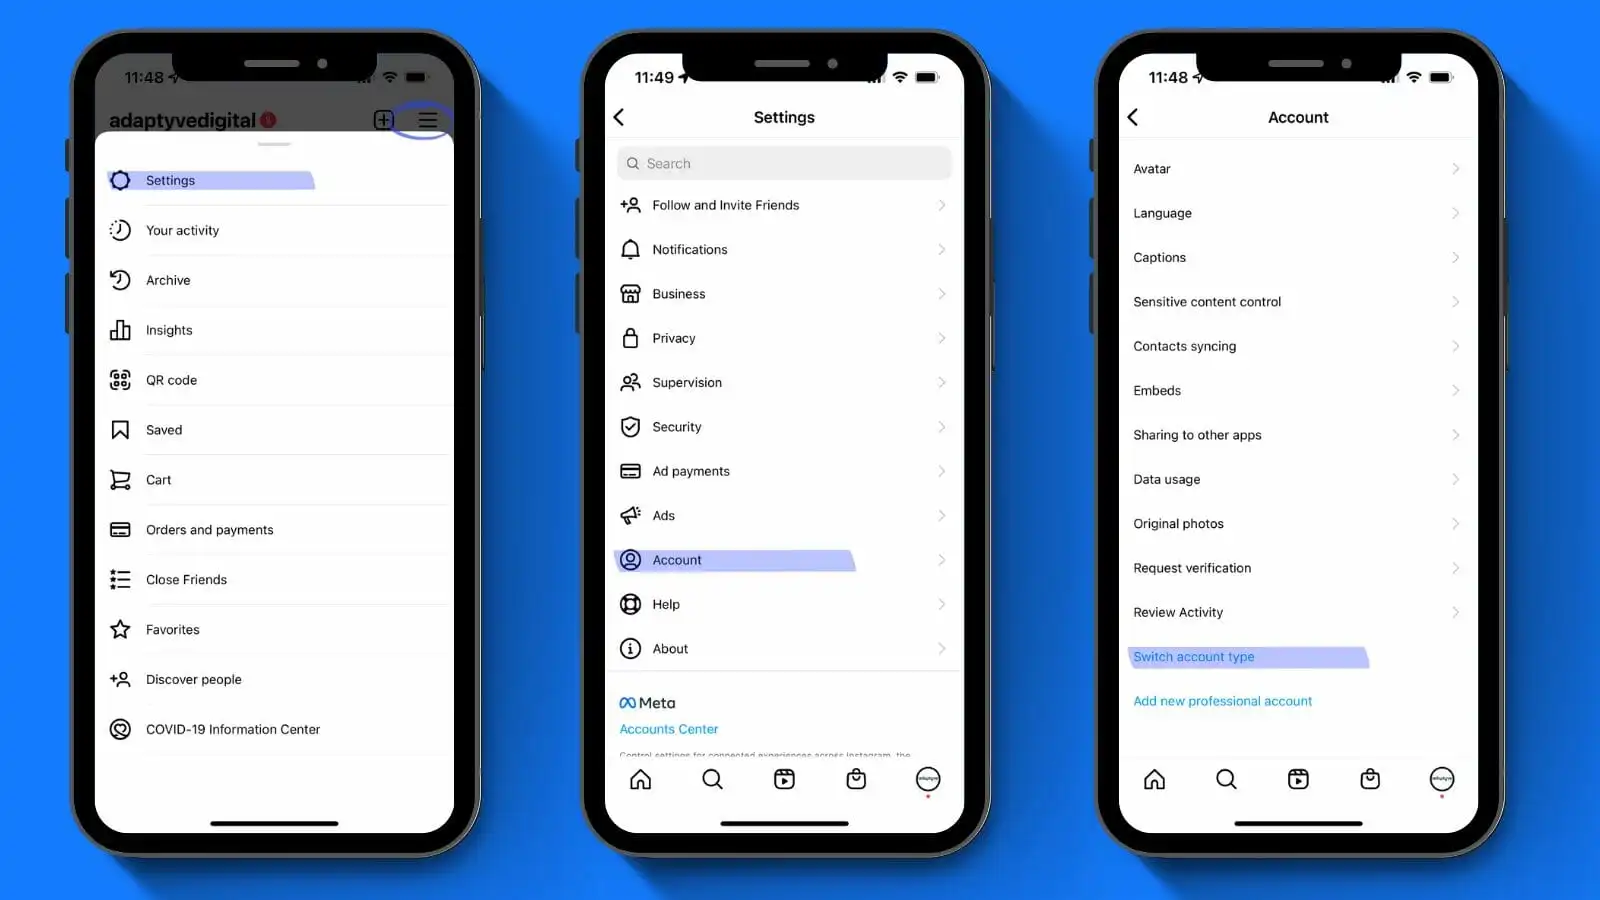
- Open your profile in the Instagram app
- Click the ☰ icon
- Go to Settings
- Then click Account > Switch account type
- Select the desired category for your business, confirm contact details, and then connect your Facebook Business page
NOTE: You cannot have a professional Instagram account without a Facebook Business page.
Step 3 - Add Instagram Shopping to Your Facebook Sales Channel
You can set up Instagram Shopping as the first feature when you install the Facebook channel or add it from the Facebook channel's Overview page at any time. If you have already set up Facebook Shop or Facebook Marketing in the Facebook channel, you may have completed some of the steps below.
- From your Shopify admin, next to SALES CHANNELS, there's a plus icon. Click it, and you'll get a menu of available sales channels to add to your store.
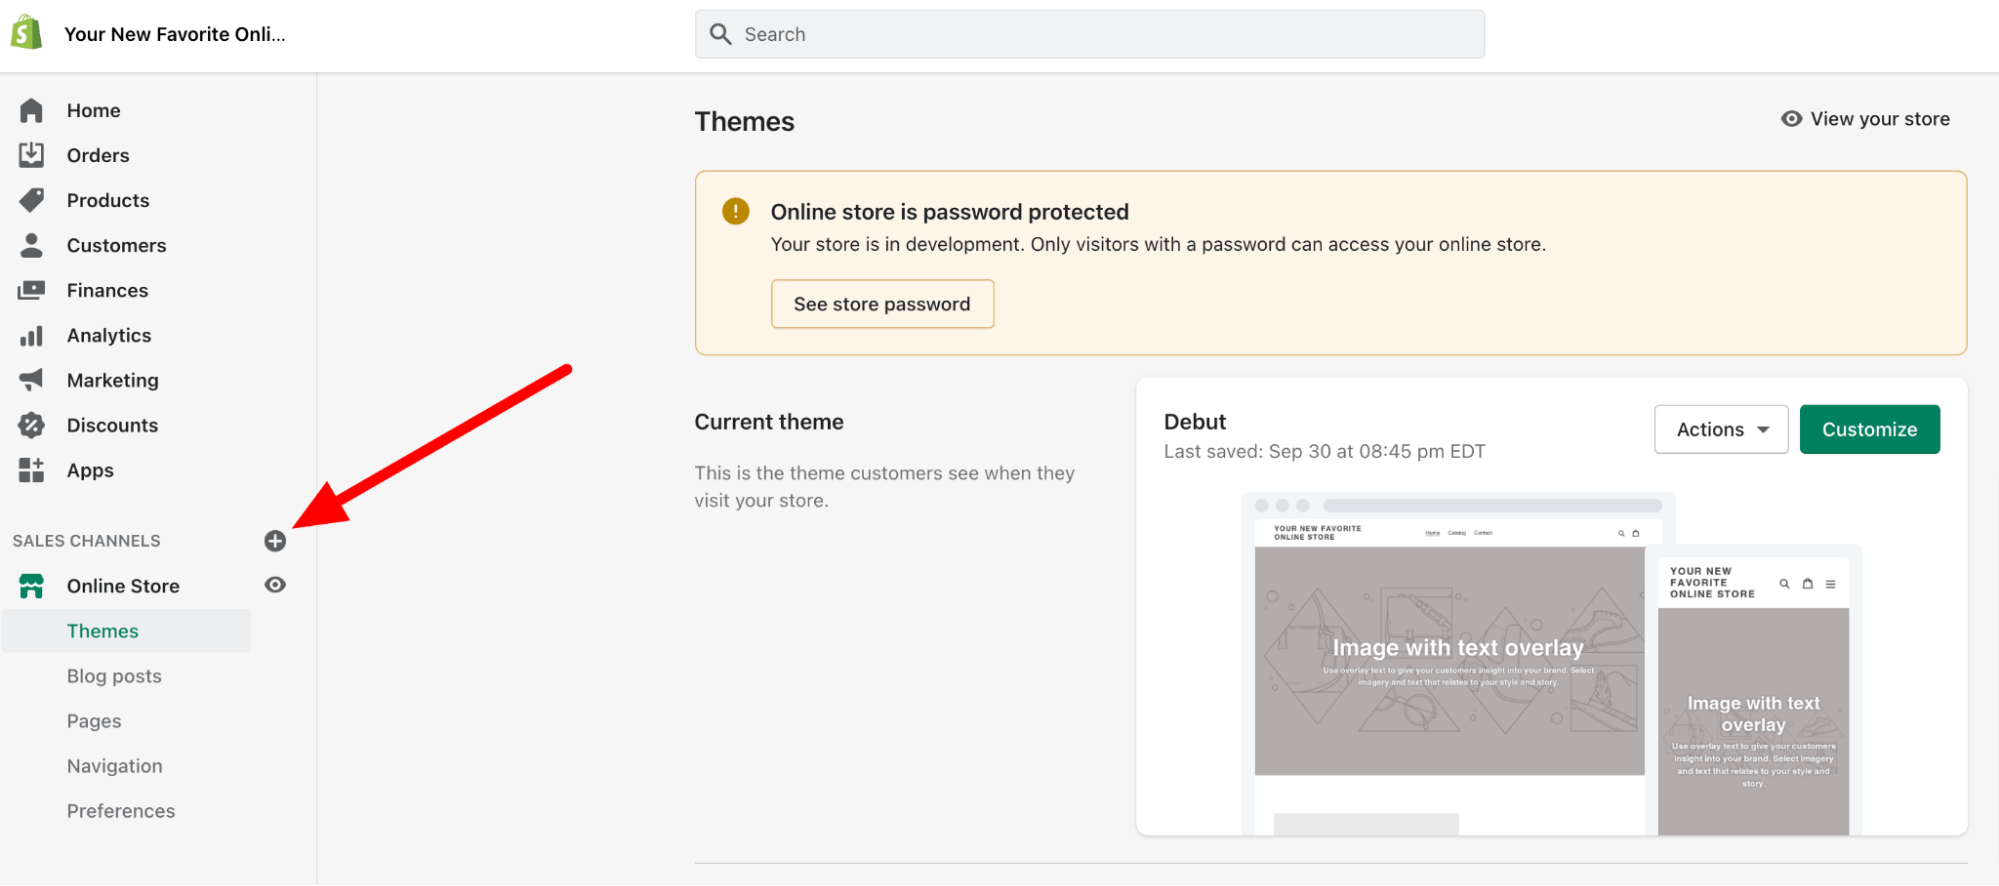
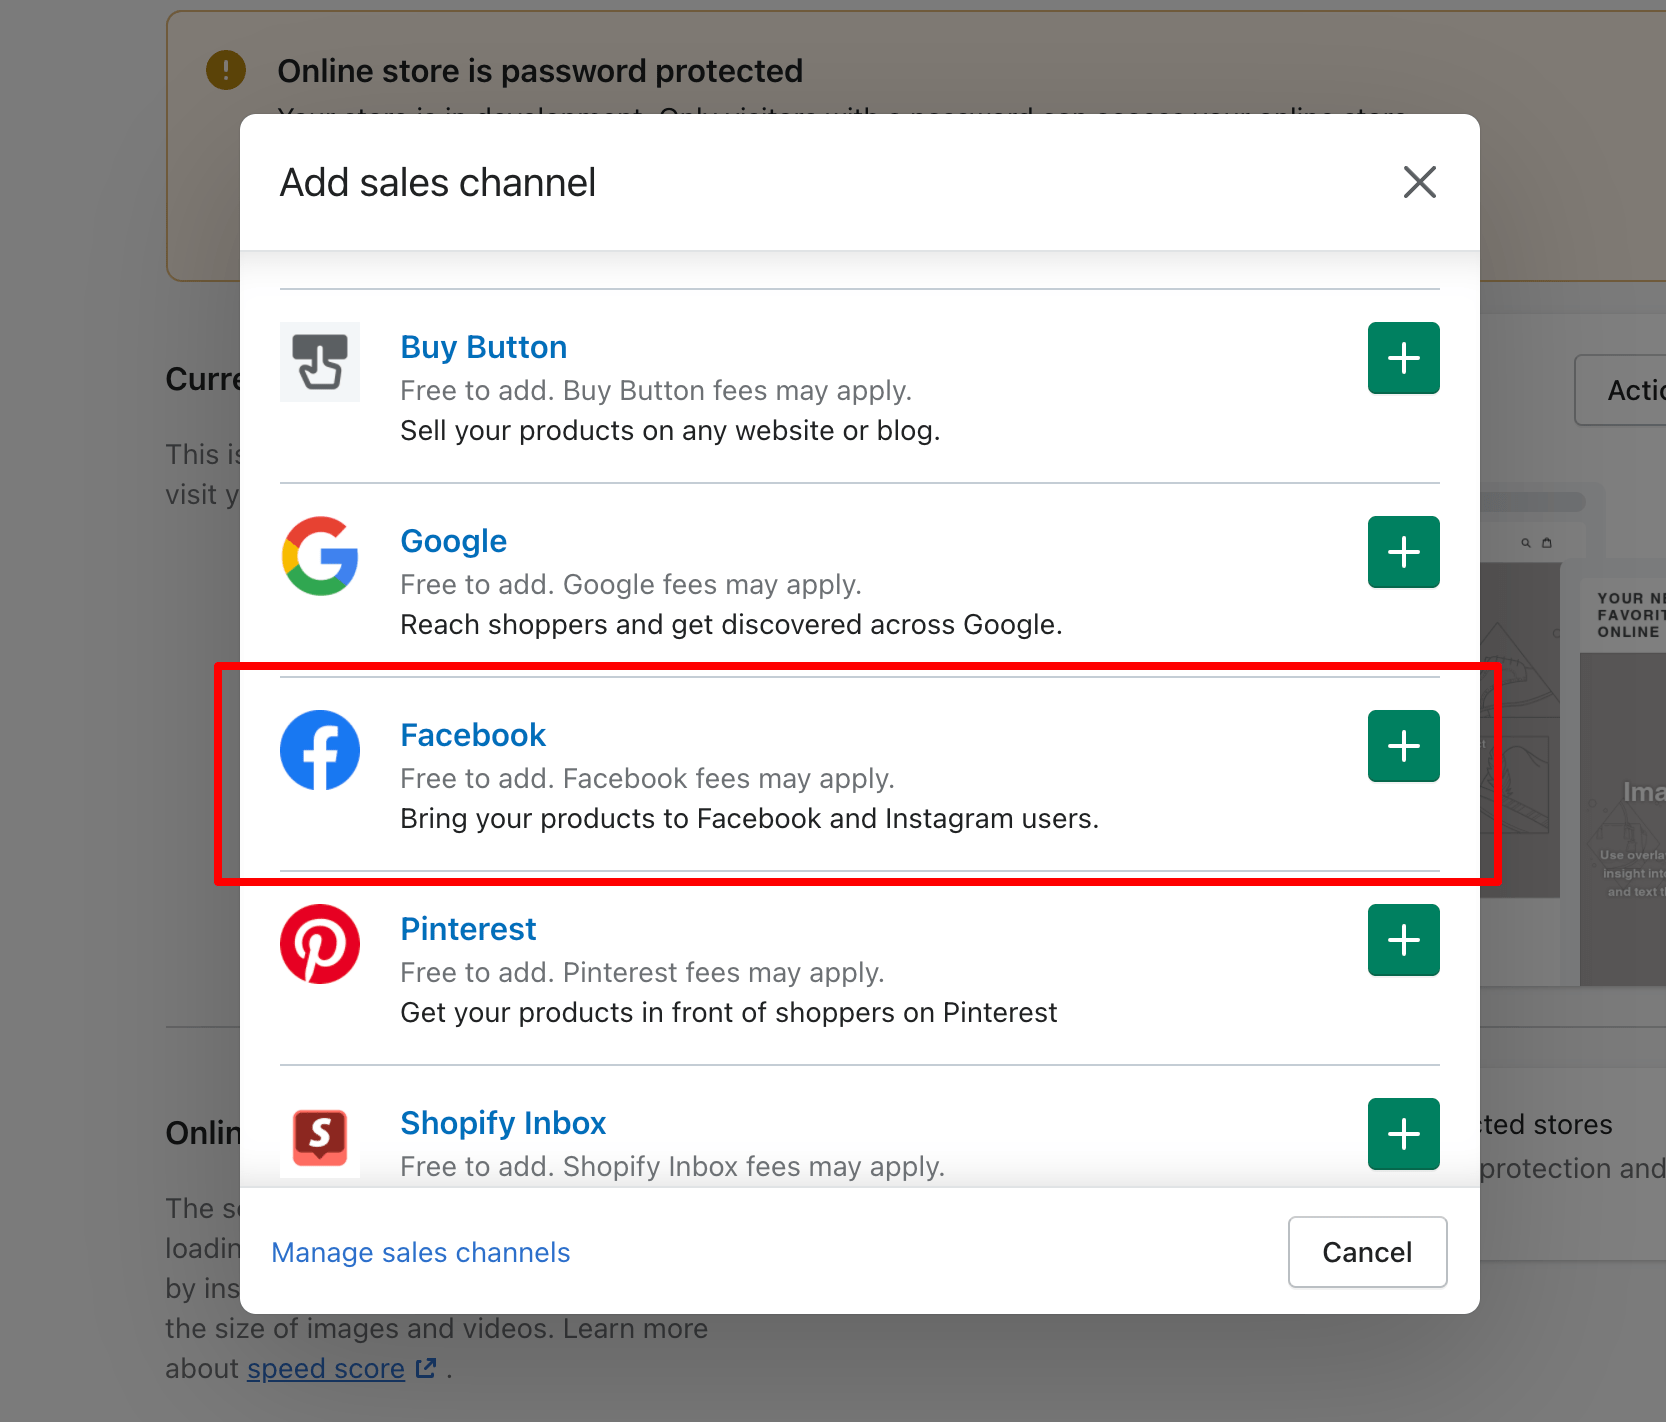
- Click the green plus icon next to the Facebook option. This will bring you to a screen detailing the permissions required for adding this sales channel.
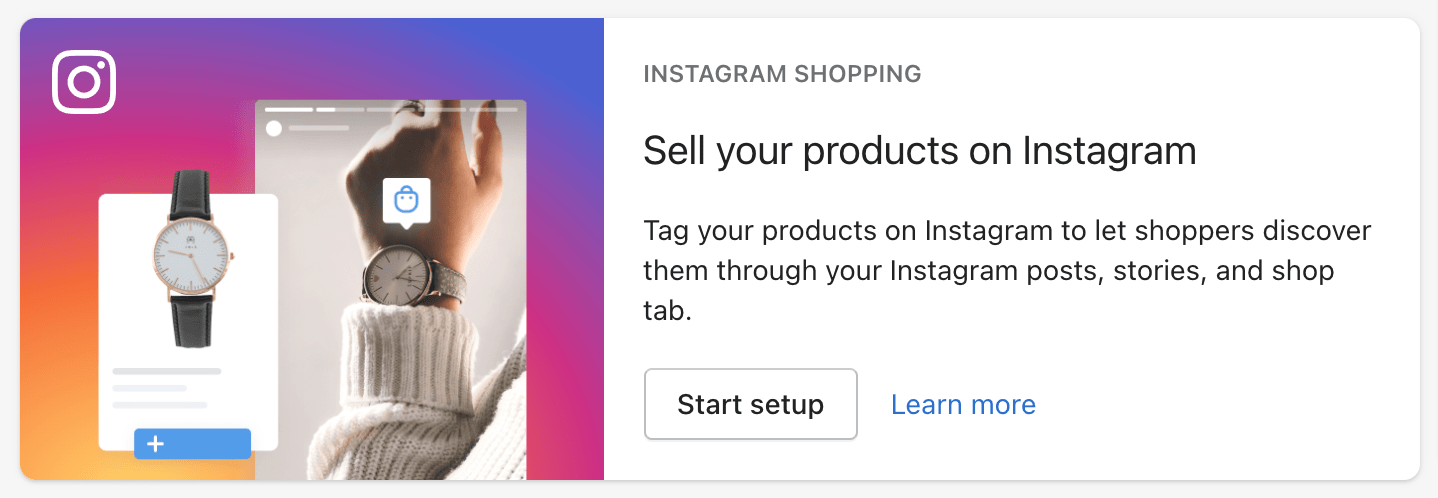
- Click Start setup in the Instagram Shopping section.
- Connect the required Facebook accounts to the Facebook channel.
- Review and accept the terms and conditions, then click Request approval.
NOTE: It takes 24-48 hours for Facebook to review your products.
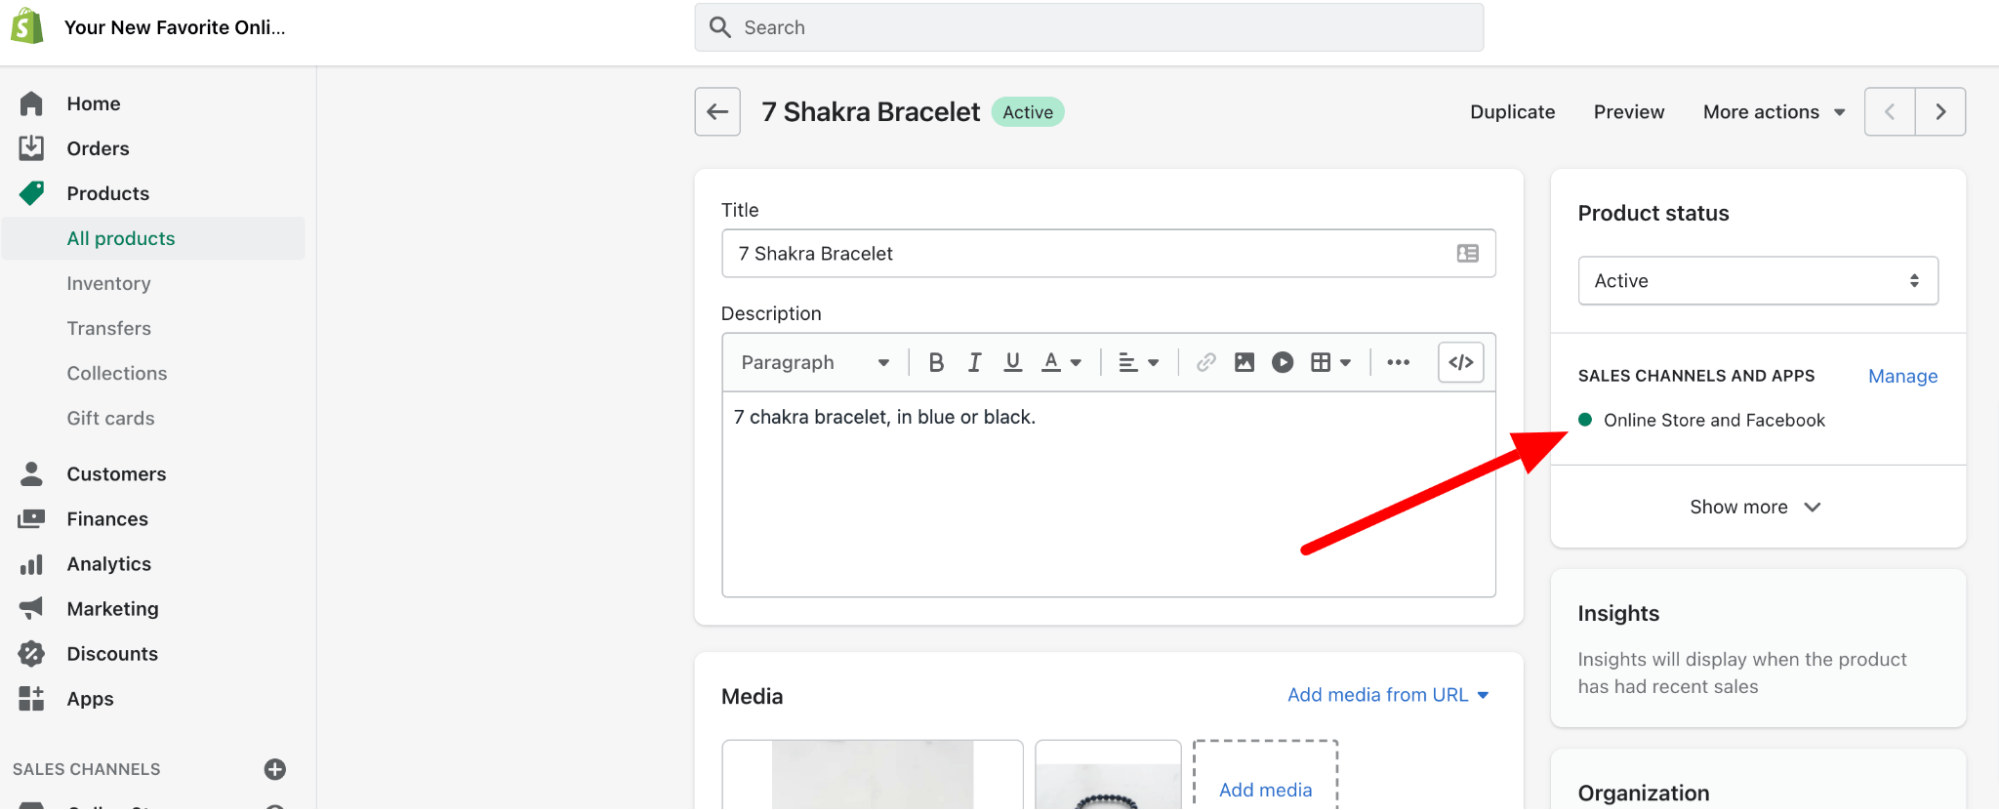
After setting up the Facebook channel, your Shopify products will start syncing to Facebook. You can select the products you want to make available to the channel on the Product page or by using the bulk editor in the Facebook channel.
When you make a product available to the Facebook channel, it's available to all of the features set up in the Facebook channel. Because all the Facebook channel's features share the same product catalog, making a product available to only one feature is not possible.
Step 4 - Add Your Product Catalog to Instagram
You can add your product catalog from the Shopping section in your Instagram business profile settings.
- Using Instagram, open your business profile options and go to the Settings section.
- Tap Business > Shopping, and then confirm your Facebook account.
- Select the product catalog you want to connect.
- Tap Done.
Step 5 - Changing the Product Descriptions
To change the product description, name, or price shown in the product tag details, you need to edit the product listing on Shopify and publish the updated product on Facebook. You can't have a different product description on Instagram and Shopify.
If there's an incorrect price for a product on Instagram, make sure your Price and Compare At Price are correct in Shopify. You can also check your Facebook Commerce Manager to make sure there's no sale start or end date on the product.
Integrating Shopify with Instagram has Massive Potential for Your Business!
If you've followed the steps in this tutorial, you should be on your way to selling directly through your Instagram.
From our experience, steps 3 & 4 may give you some trouble, but overall the process is pretty straightforward. However, due to issues with Facebook Business Manager, we have seen some connection issues with a business page. These issues are rare but can be a speed bump that holds up your integration process.

